Nolus emerges as a groundbreaking decentralized finance (DeFi) platform, offering a unique solution to the prevalent issue of over-collateralization in the DeFi realm. Traditional DeFi lending platforms often necessitate borrowers to pledge collateral exceeding their borrowing amount, posing challenges for many potential participants. Nolus innovatively counters this by facilitating asset leasing between users, eliminating the need for borrowers to furnish collateral. Instead, the onus is on the lender.
Built on the robust Cosmos SDK, Nolus ensures seamless interoperability with other Cosmos-based DeFi platforms, enhancing user flexibility in asset management. In essence, Nolus stands as a beacon in the DeFi space, simplifying loan access while addressing over-collateralization concerns.
Why Choose Nolus?
Nolus isn’t just another DeFi platform; it’s a revolution. Here’s why:
-
Decentralization at its Core: Unshackled from traditional financial regulations, Nolus offers a breath of fresh air for those seeking alternatives to conventional lending institutions;
-
Open for All: With its permissionless nature, Nolus welcomes everyone, irrespective of credit history or financial background;
-
Crystal Clear Operations: With every transaction etched on a public blockchain, Nolus champions transparency, ensuring fairness and traceability;
-
Zero Collateral Loans: The unique leasing model negates the need for borrowers to provide collateral, simplifying DeFi loan access;
-
Attractive Loan Rates: Experience competitive DeFi loan rates with Nolus;
-
User-Friendly Interface: Navigate easily and make the most of the intuitive Nolus platform;
-
Fortified Security: Harness the power and security of the Cosmos SDK with Nolus.
Considering a DeFi platform that’s user-friendly, secure, and offers competitive rates? Nolus is your perfect match. This guide’ll walk you through staking NLS with the Leap wallet. Specifically, we’ll delve into:
-
Staking NLS via the Leap Extension
-
The procedure for staking NLS on LeapBoard
-
Steps to stake NLS using the Leap Mobile App.
What is the Leap Wallet?
If you’ve been looking for a dependable wallet tailored for Cosmos blockchains, the Leap Wallet might be your answer. Designed with a user-centric approach, Leap Wallet serves as a comprehensive solution, simplifying the complexities of the interchain landscape for its users.
Leap wallet is a non-custodial wallet for the Cosmos ecosystem, allowing users to manage assets across 40+ Cosmos chains. Available on mobile (iOS and Android), as a browser extension, and as a web dashboard.
Leap provides the following features:
-
Delegated staking and seamless management in the decentralized landscape;
-
Active participation in decentralized governance;
-
Native in-wallet Osmosis swaps, bridging the DeFi divide;
-
Direct access to the evolving world of Cosmos dApps;
-
Seamless integration with Ledger for fortified security;
-
Inter-Blockchain Communication (IBC) transfers, redefining asset interoperability across chains;
-
Flexibility to onboard existing Keplr or Cosmostation wallets;
-
Real-time Leap Alerts, keeping you in sync with the pulse of on-chain events across Cosmos – from transactions to governance shifts and staking dynamics;
-
The Leapboard dashboard: a decentralized command center visualizing your portfolio, enabling governance actions, staking, IBC transfers, and instant decentralized notifications.
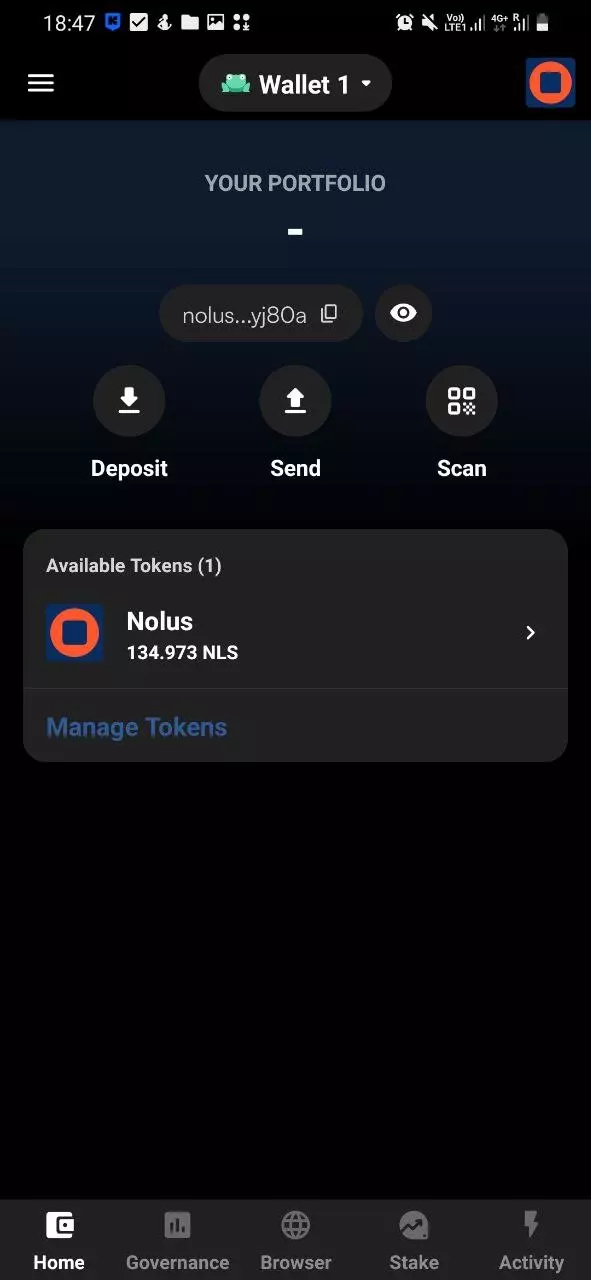
How to fund your Leap wallet
Osmosiszone is a trusted platform for obtaining NLS tokens. Head to their app and follow the provided instructions to secure your tokens.
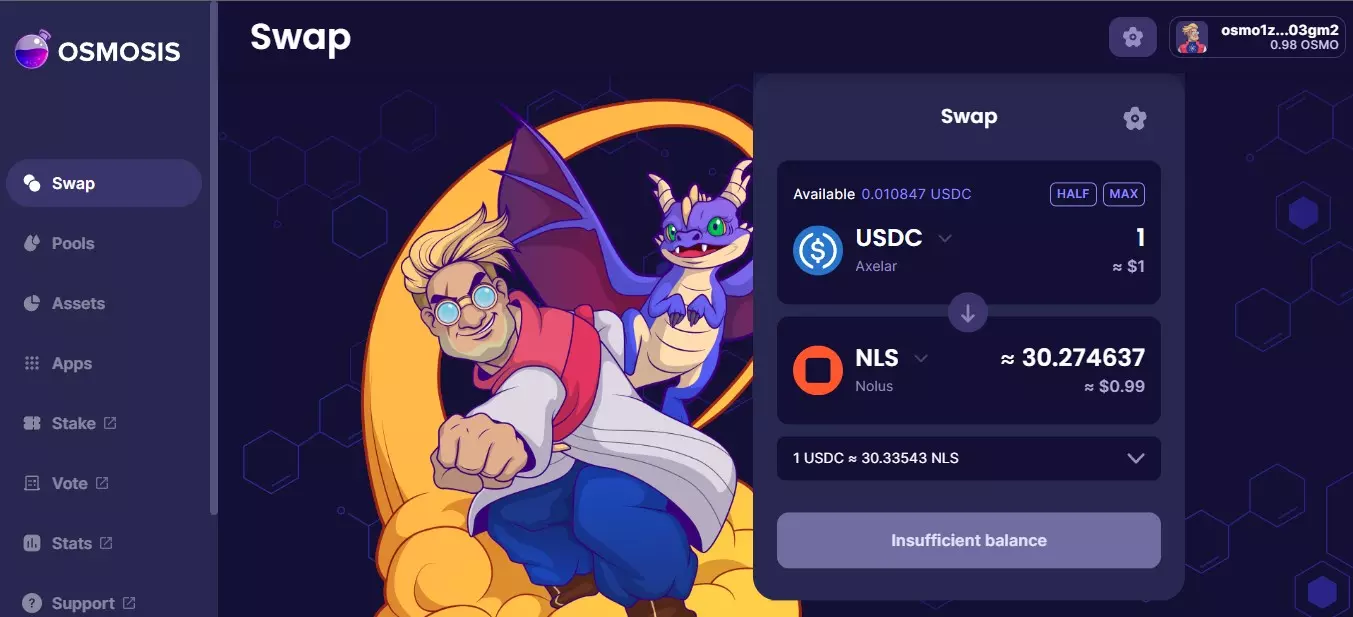
Step 1: Acquire NLS Tokens
Navigate to the SWAP section. Here, you can exchange tokens from your Osmosis-connected wallet for NLS tokens. Input the desired amount, and with a minimal commission in OSMO tokens, complete the swap to obtain NLS.
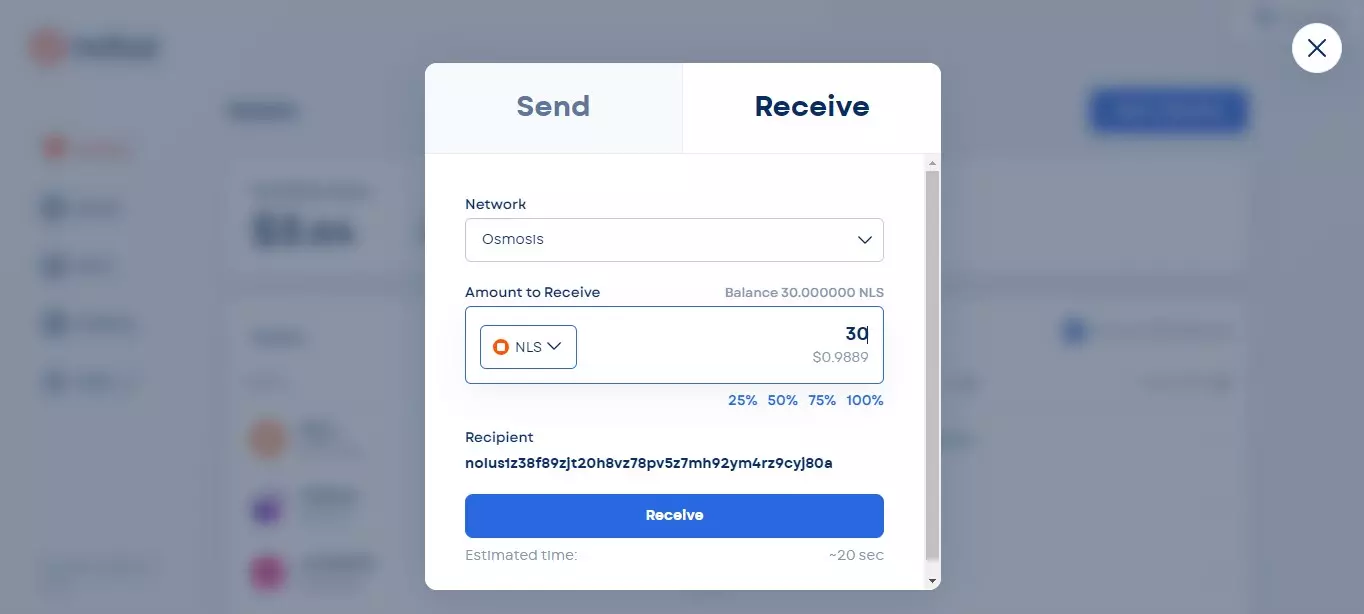
Step 2: Transfer NLS from Osmosis to Nolus App
Open the Nolus App and find the option labeled Send/Receive. Choose Receive tab and set Osmosis as the intended network for the transfer.
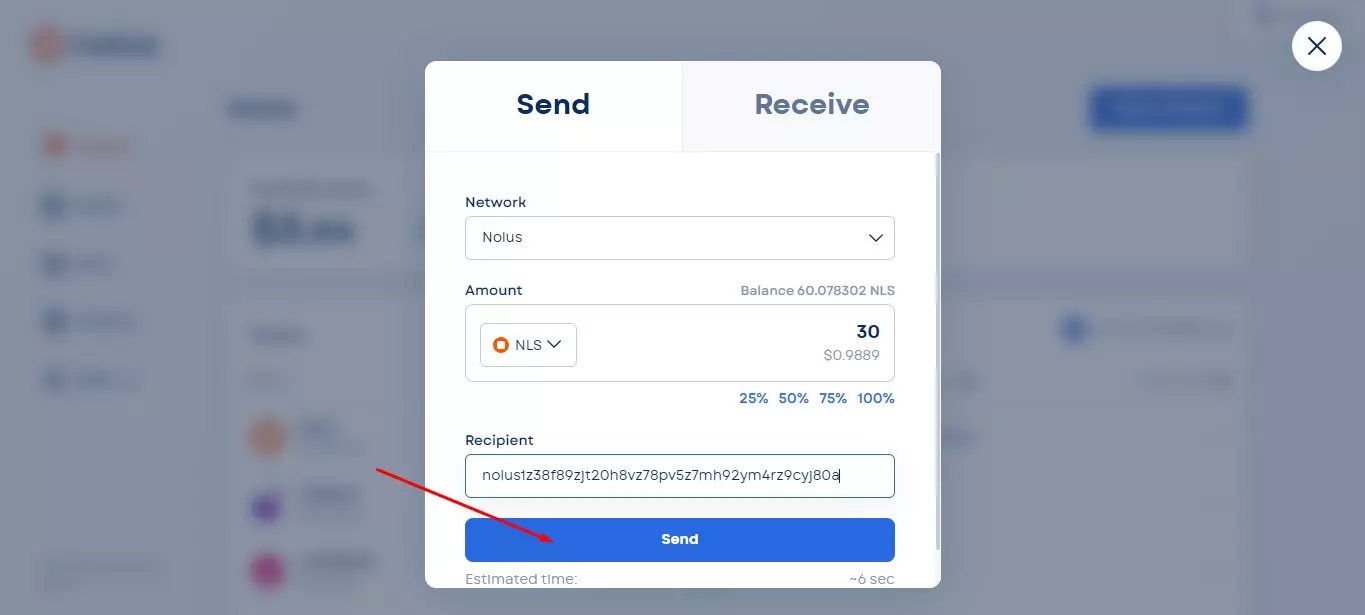
Step 3: Determine the Transfer Amount and Destination
Move to Send tab and indicate the specific quantity of NLS tokens you intend to transfer. Once set, initiate the transfer from the Nolus App directly to your Leap Wallet by clicking Send.
How to Stake NLS Using the Leap Extension
Staking NLS using the Leap Extension is a straightforward process that can be broken down into two main stages:
-
Wallet creation;
-
Staking process.
Create Leap Extension Wallet
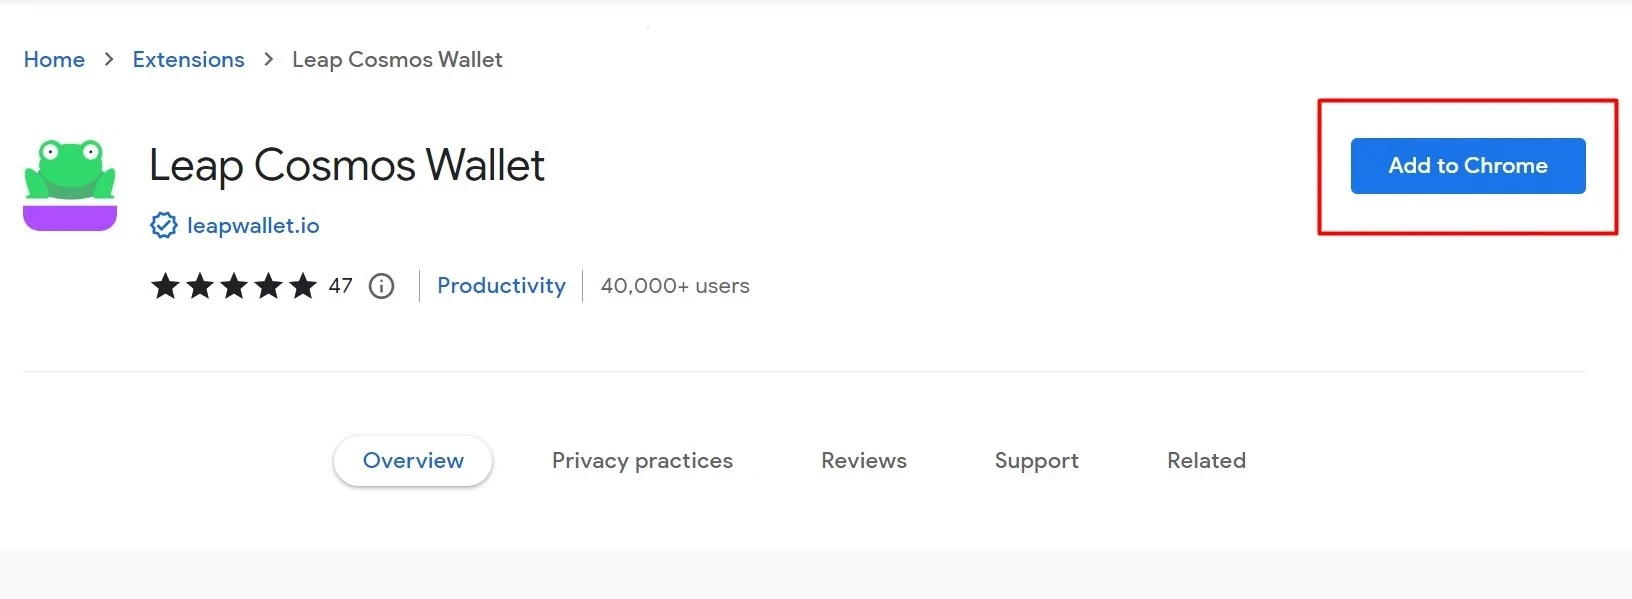
Step 1: Install the Extension
Navigate to your web browser’s extension store and click Add to Chrome to download the Leap Wallet extension.
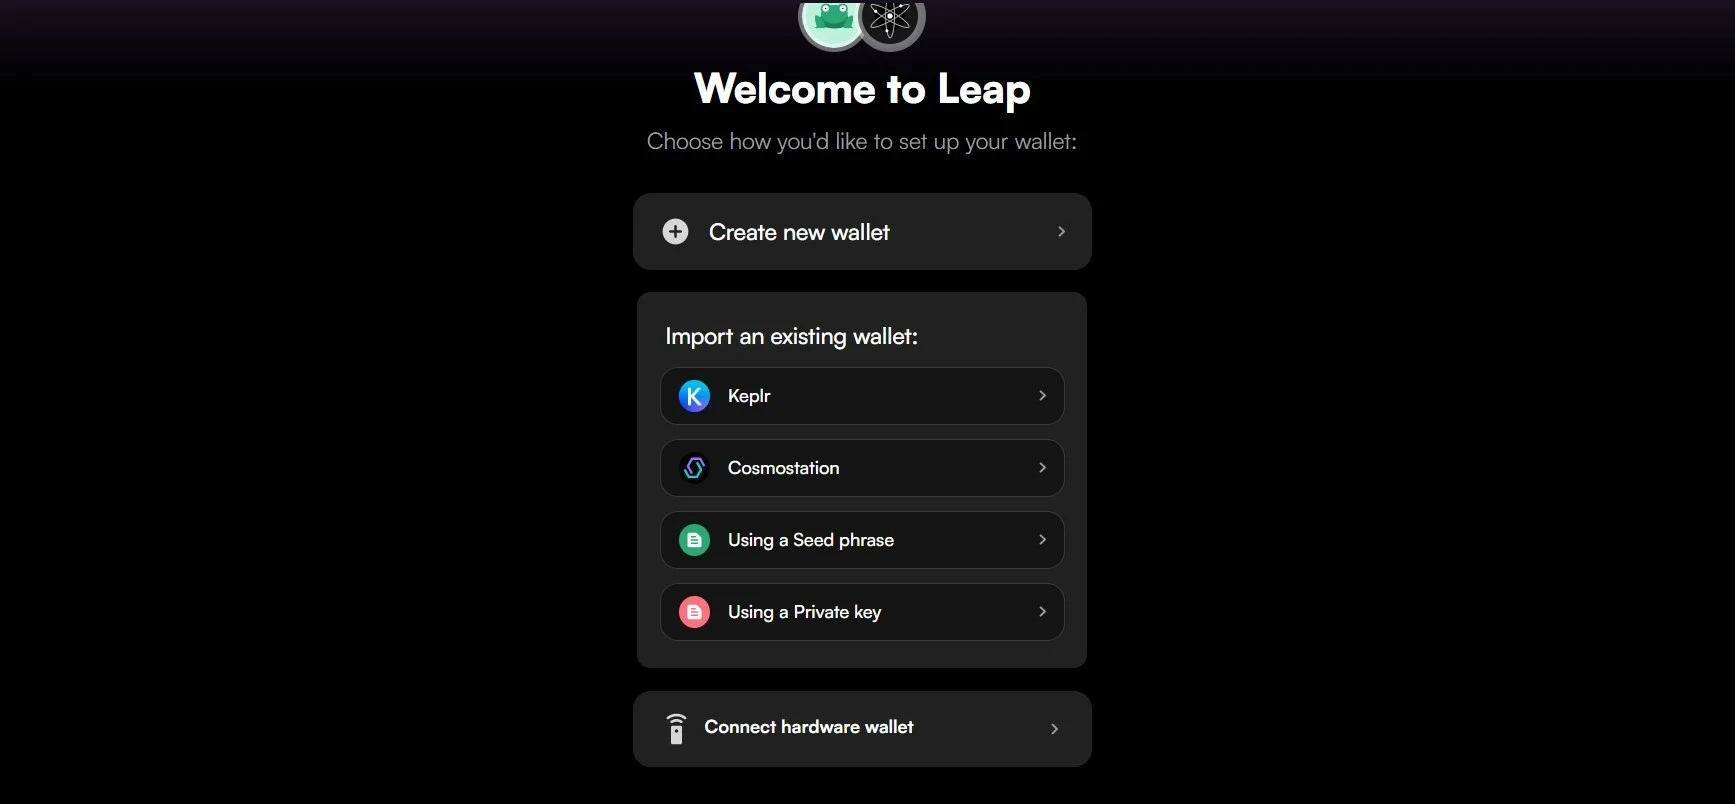
Step 2: Select Your Wallet Configuration
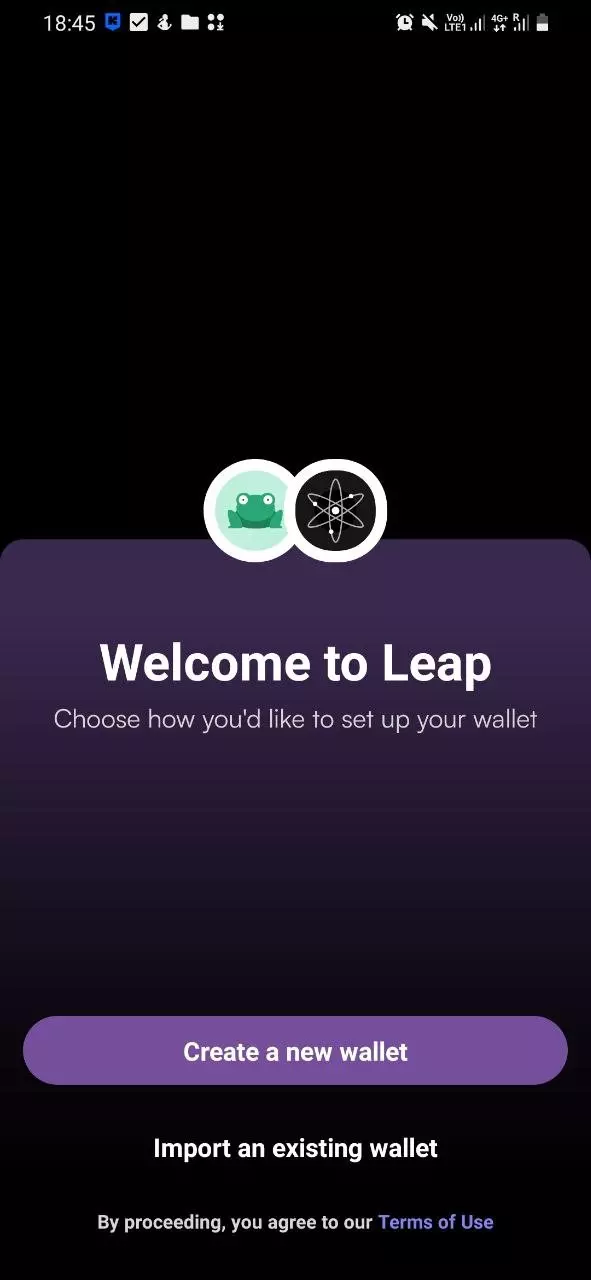
Upon opening the Leap Wallet extension, you’ll be greeted with three primary options:
-
Create a new wallet;
-
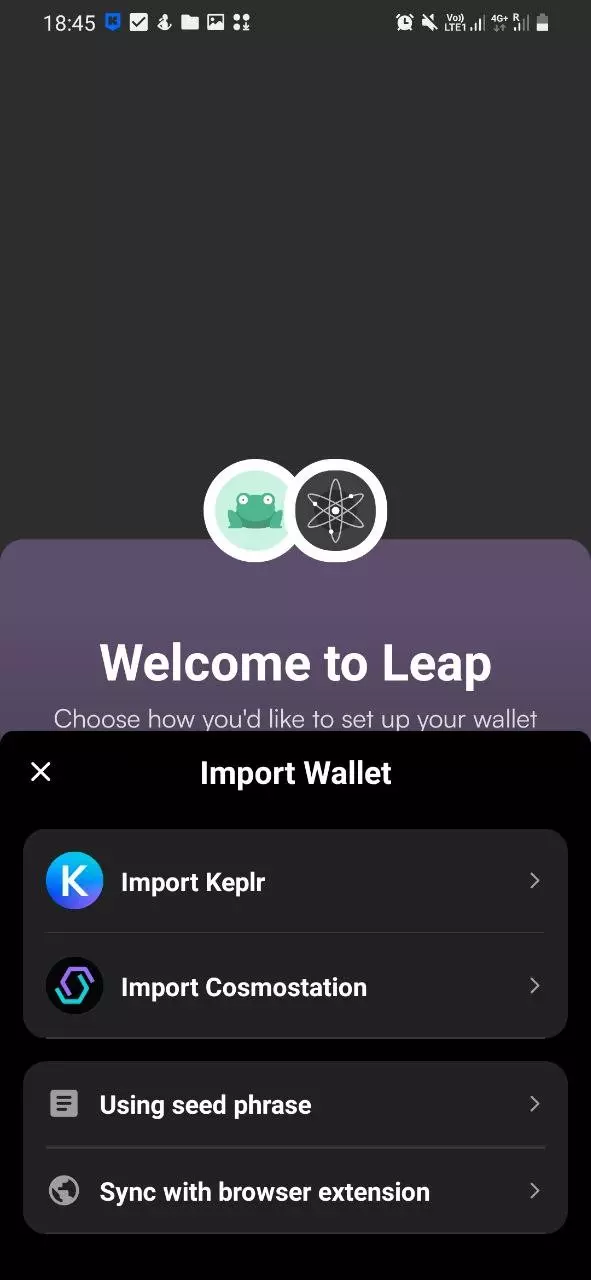
Import an existing wallet;
-
Connect to a hardware wallet.
For the context of this guide, we’ll focus on creating a new wallet from scratch.
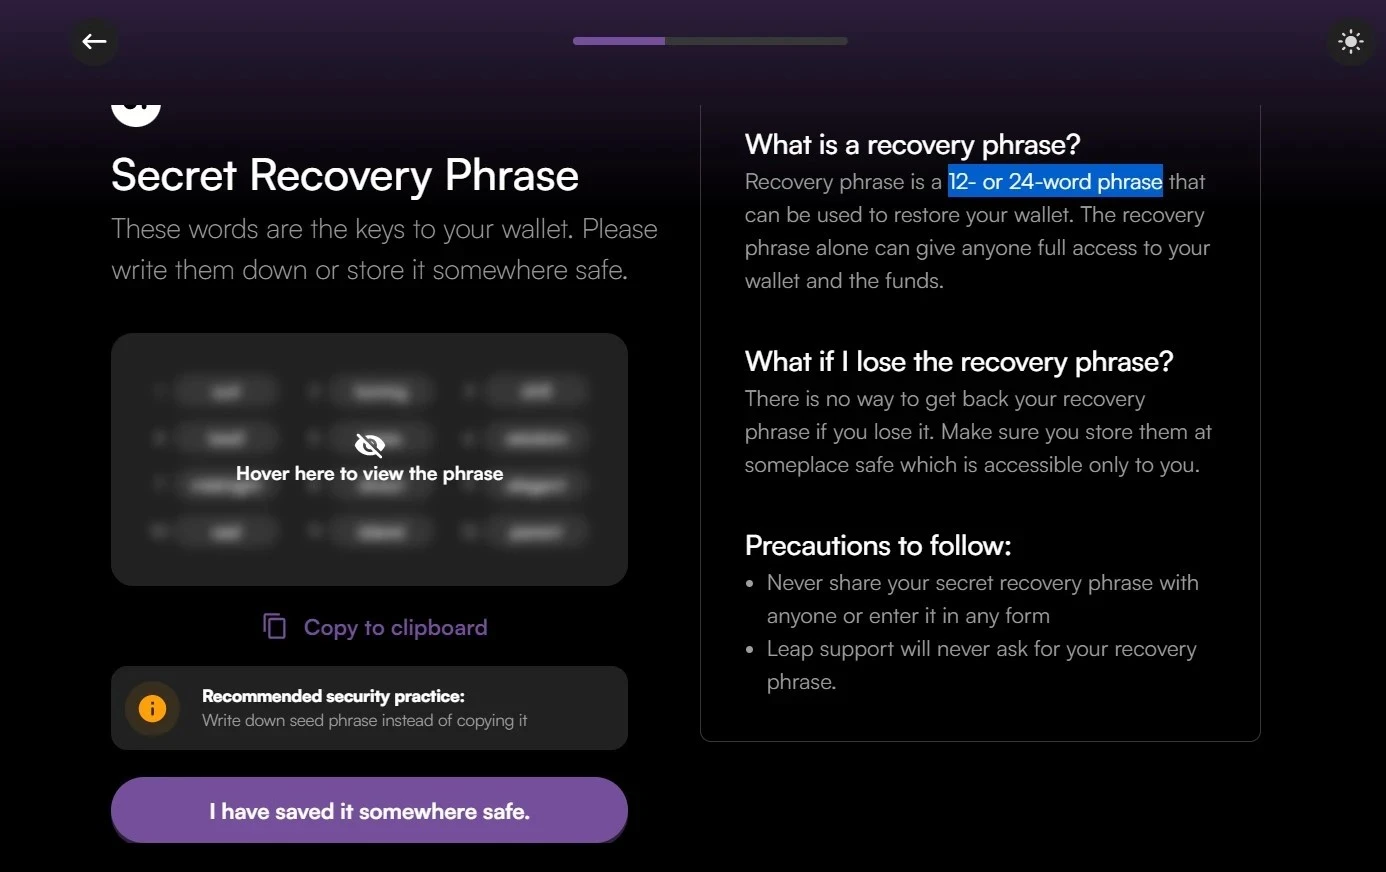
Step 3: Safeguard Your Recovery Phrase
Next, you’ll be presented with a 12- or 24-word recovery phrase. This phrase is critical for accessing and restoring your wallet in the future.
Here are some best practices for handling your recovery phrase:
-
Physical Record: Jot down your recovery phrase on paper and ensure it’s stored in a secure location, preferably one that only you can access;
-
Dedicated Storage: Consider using a device specifically designed for seed phrase storage;
-
Multiple Copies: It’s wise to have more than one written copy to safeguard against unforeseen circumstances like loss or damage;
-
Digital Precautions: Refrain from capturing screenshots or copying the phrase electronically, as this could make it vulnerable to security breaches;
-
Confidentiality: Your recovery phrase is your wallet’s key. Never share it with anyone under any circumstances.
Remember, the safety of your assets hinges on the security of this phrase. Handle with care.
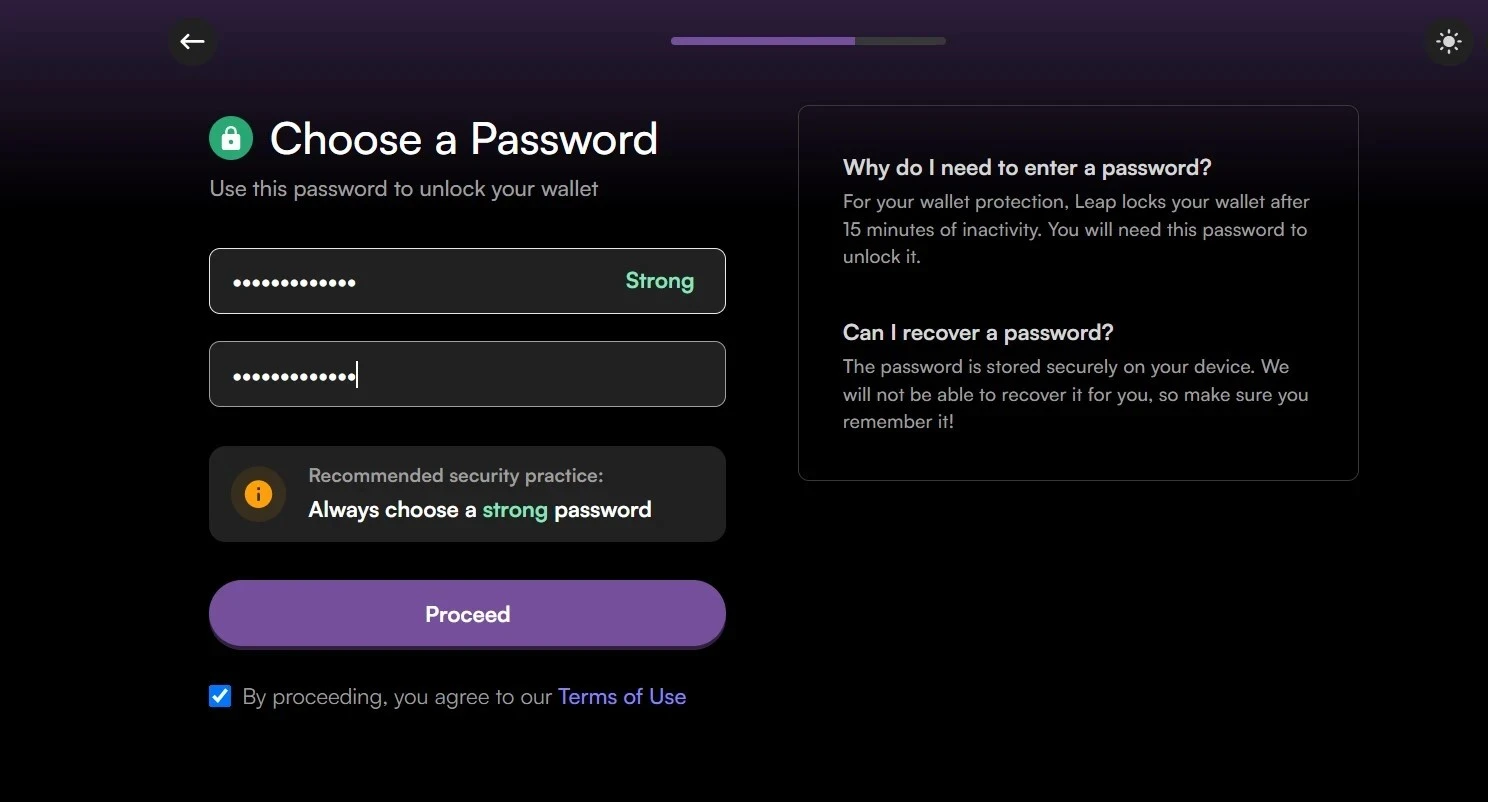
Step 4: Set a Robust Password
Next, you’ll need to establish a secure password to unlock your wallet. Ensure it’s strong, combining uppercase and lowercase letters, numbers, and special characters. Once you’ve settled on a password, click Proceed to move forward.
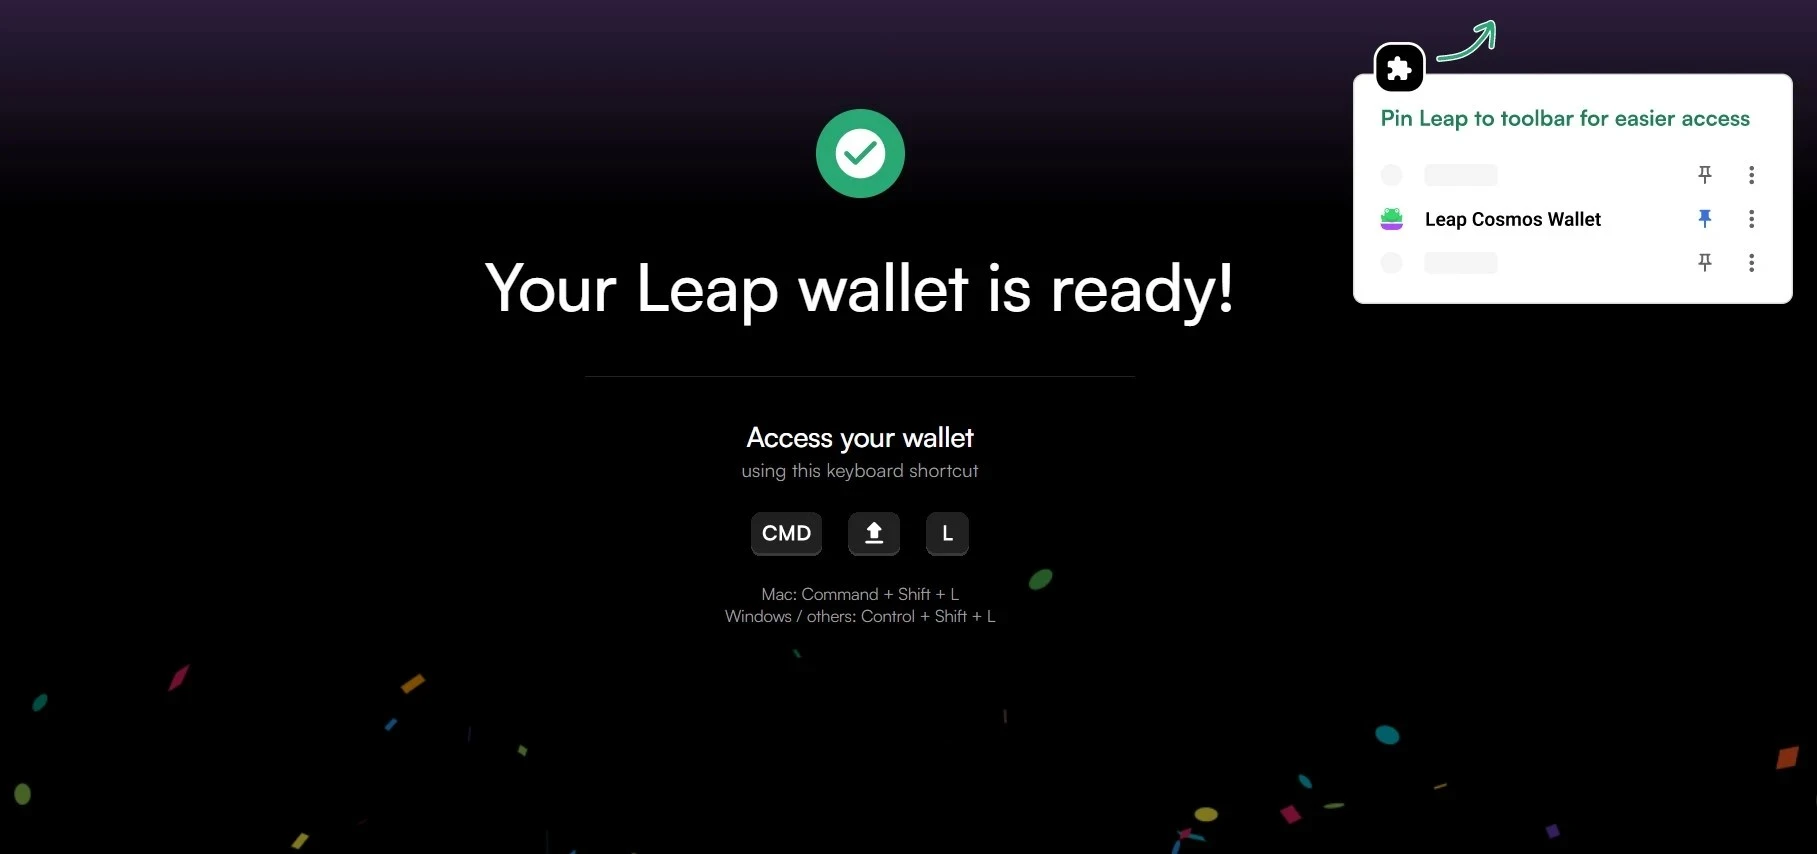
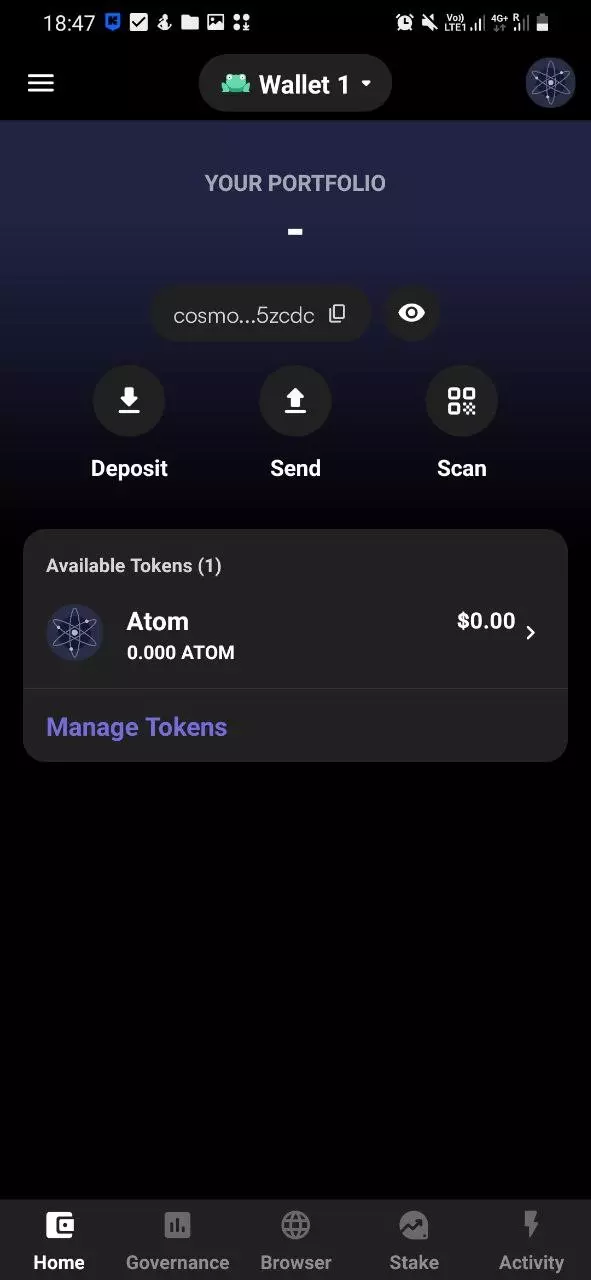
Step 5: Accessing Your Wallet
After successfully setting up, your Leap wallet will be readily accessible from the extensions toolbar in your Google Chrome browser. Simply look for its icon, and you’ll be able to manage and view your assets quickly.
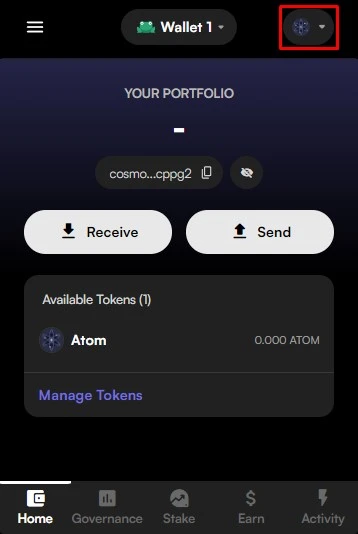
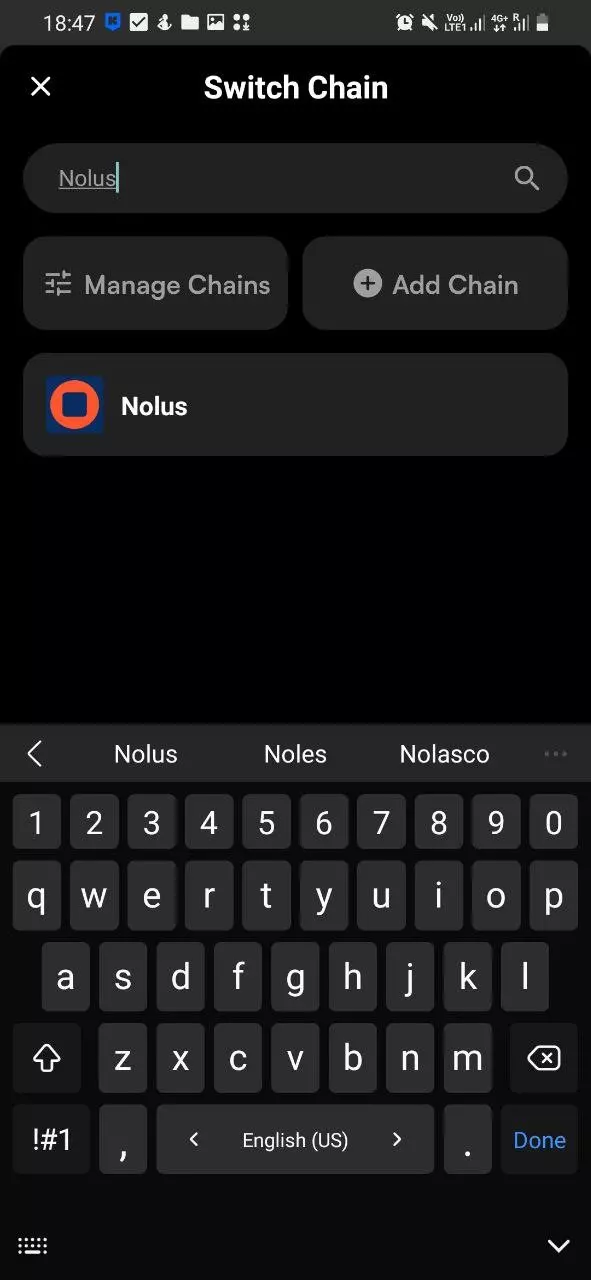
Step 6: Add Nolus as your chain
To select Nolus, click on the wallet icon at the top right corner of your app. This will open a dropdown menu displaying a list of available chains. Scroll through this list until you find Nolus. Once located, click on it to select.
Stake NLS in Extension
Step 7: Staking NLS
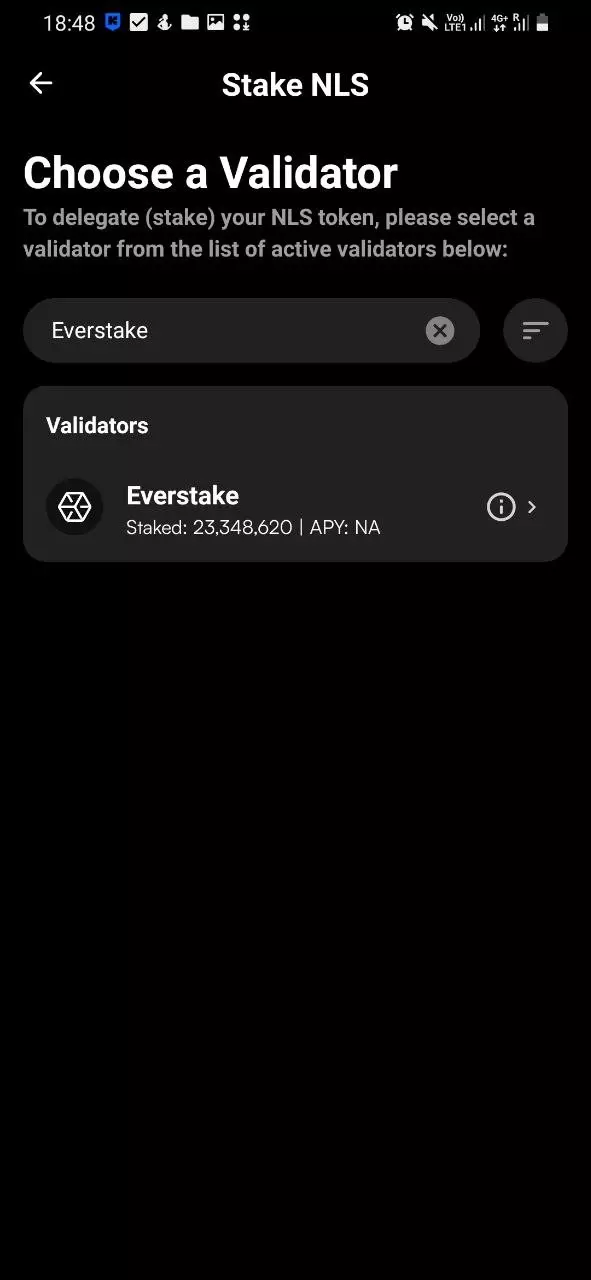
To stake your NLS tokens, navigate to the Stake section on the main dashboard. Once there, click on the Stake button. You’ll then be presented with a list of available validators. Browse through and select the validator you trust or prefer to delegate your NLS tokens to. Ensure you’ve done your research on the validators to make an informed decision.
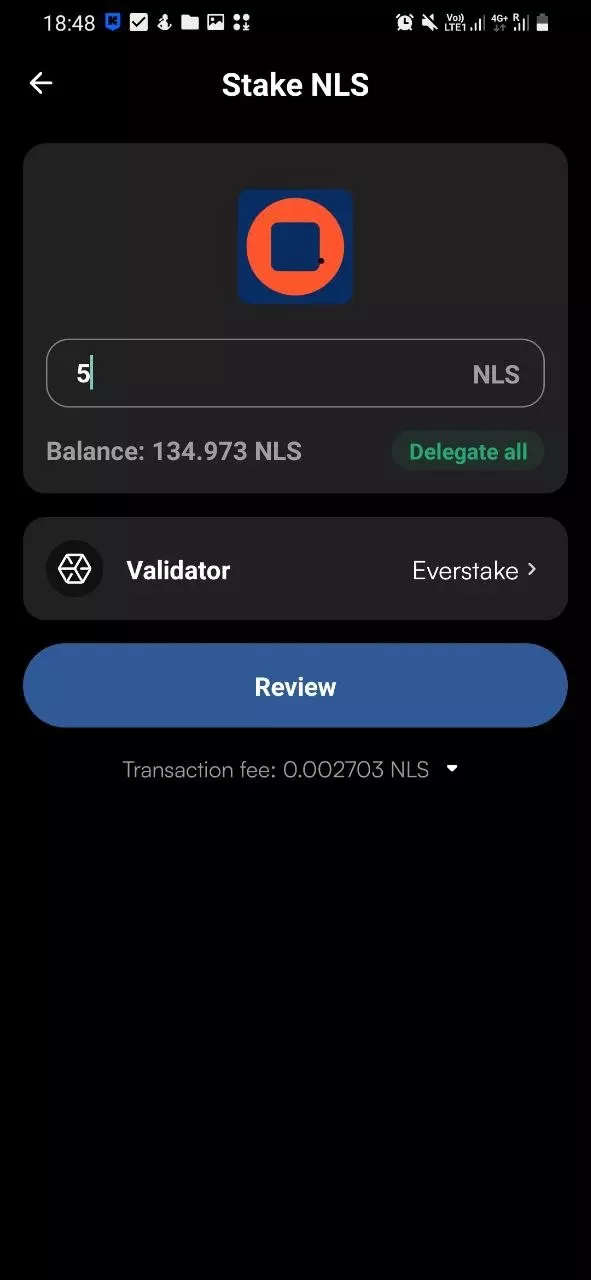
Step 8: Delegating Your NLS Tokens
Now, specify the quantity of NLS tokens you wish to delegate. Once you’ve entered the desired amount, click on Review. It’s advisable to retain a minor balance of NLS in your wallet to cater to any upcoming transaction costs. Thoroughly inspect the transaction details presented. If all the information aligns with your intentions, proceed by clicking on Stake NLS. Ensure you’re confident with your decision, as staking often involves locking up your tokens for a set period.
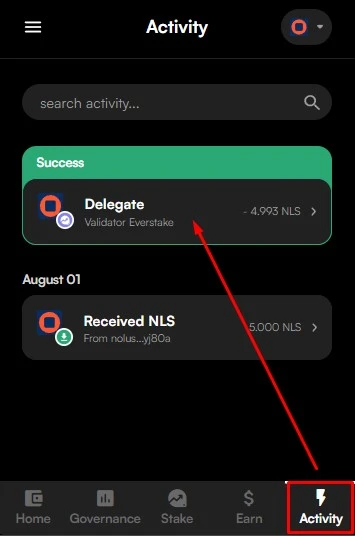
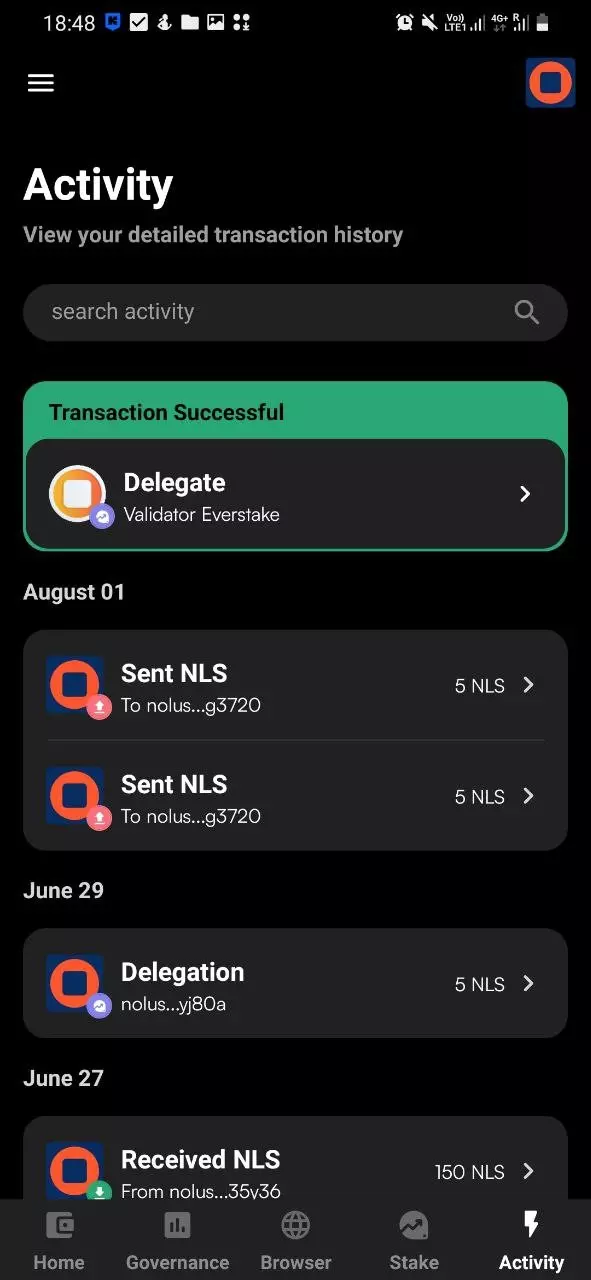
Once completed, you will see your delegation in the Activity section.
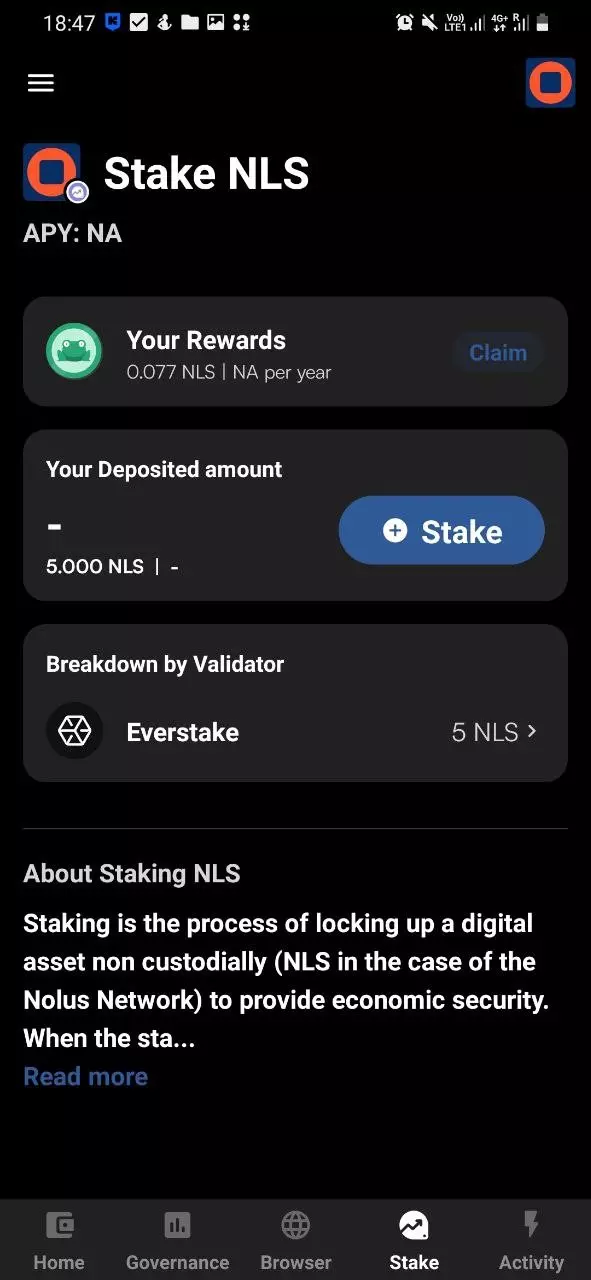
Step 9: Overseeing Your Delegation
To keep tabs on and manage your staked NLS tokens, head back to the Stake section. Here, you can view a detailed breakdown of your delegations by navigating to Stake and then selecting Breakdown by Validator. This feature provides a clear picture of where your tokens are delegated, allowing for informed decisions should you wish to make any changes in the future.
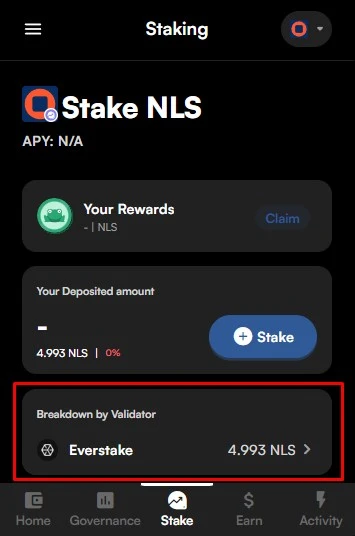
Within this interface, you can:
-
Claim: Access your staking rewards. These rewards bypass the 20-day unbonding period and are immediately liquid for further transactions.
-
Stake: Allocate more tokens to the existing validator.
-
Unstake: Initiate the unbonding process, keeping in mind the 20-day unbonding period. No rewards are accrued during this window.
-
Switch Validator: Redelegate your staked tokens to a different validator on-the-fly, ensuring continuous staking rewards. Post-redelegation (e.g., transitioning from validator A to B), there’s a 20-day cooldown before you can redelegate from validator B.
How to Stake NLS Using LeapBoard
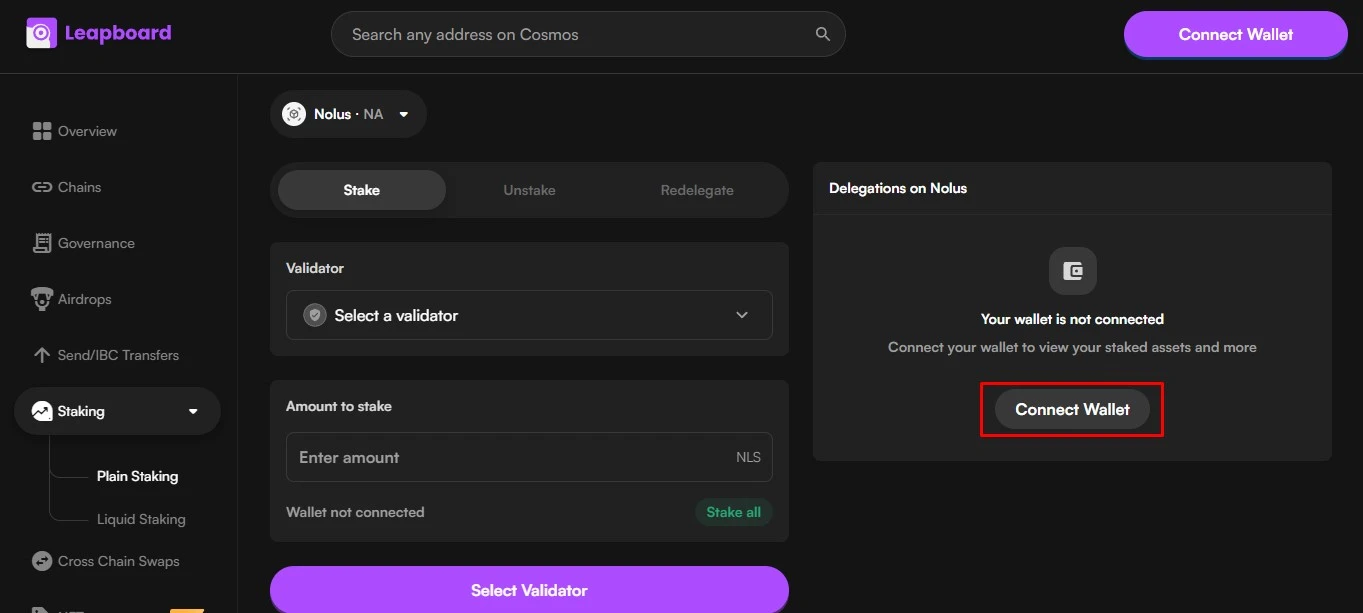
Step 1: Find the Nolus dashboard and Connect your wallet
Access the Nolus dashboard by visiting the Cosmos Dashboard. This portal provides a comprehensive view of your Nolus-related activities and assets. Once there, click on the Connect Wallet button to proceed.
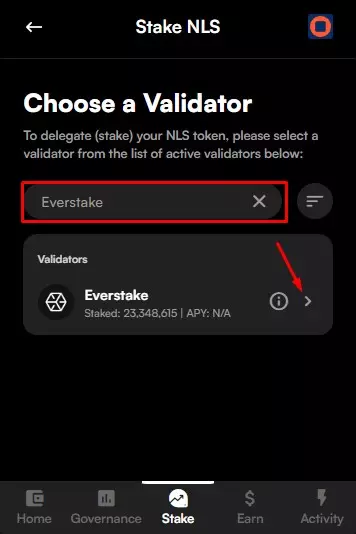
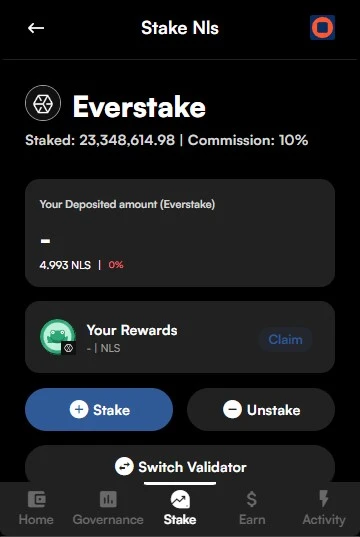
Step 2: Stake NLS
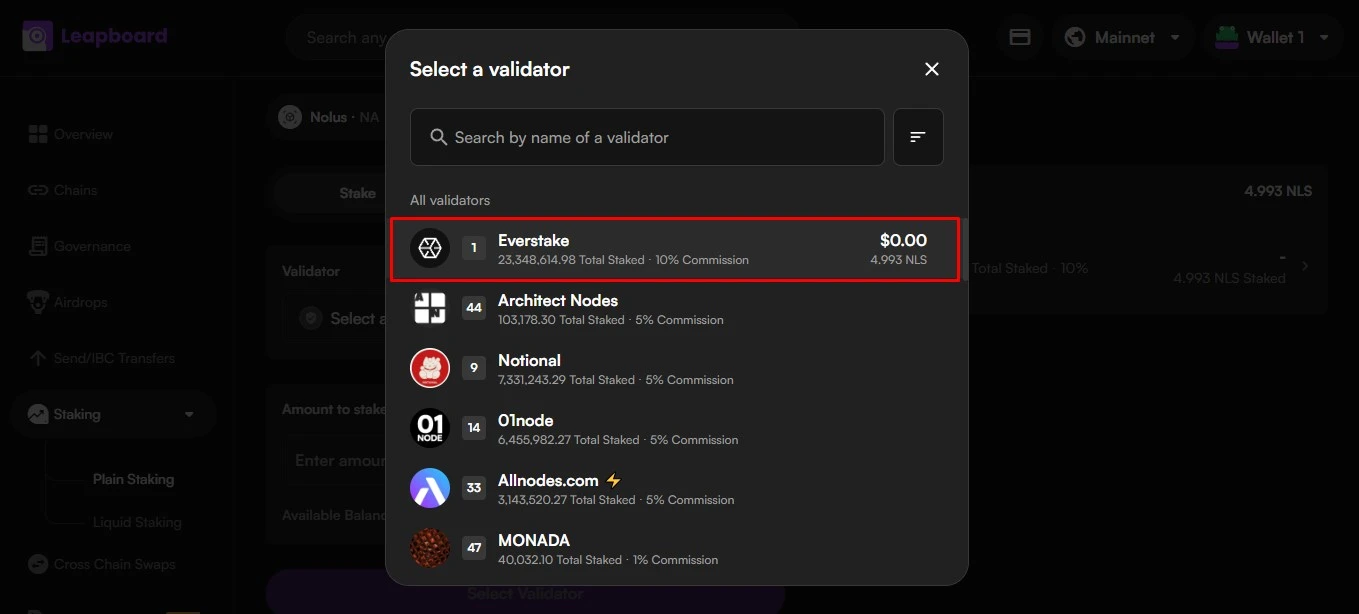
Navigate through the list of validators and select Everstake as your preferred choice to delegate your NLS tokens.
Enter the amount of NLS tokens you wish to delegate to Everstake. Ensure you have sufficient balance, and keep a small reserve for potential transaction fees.
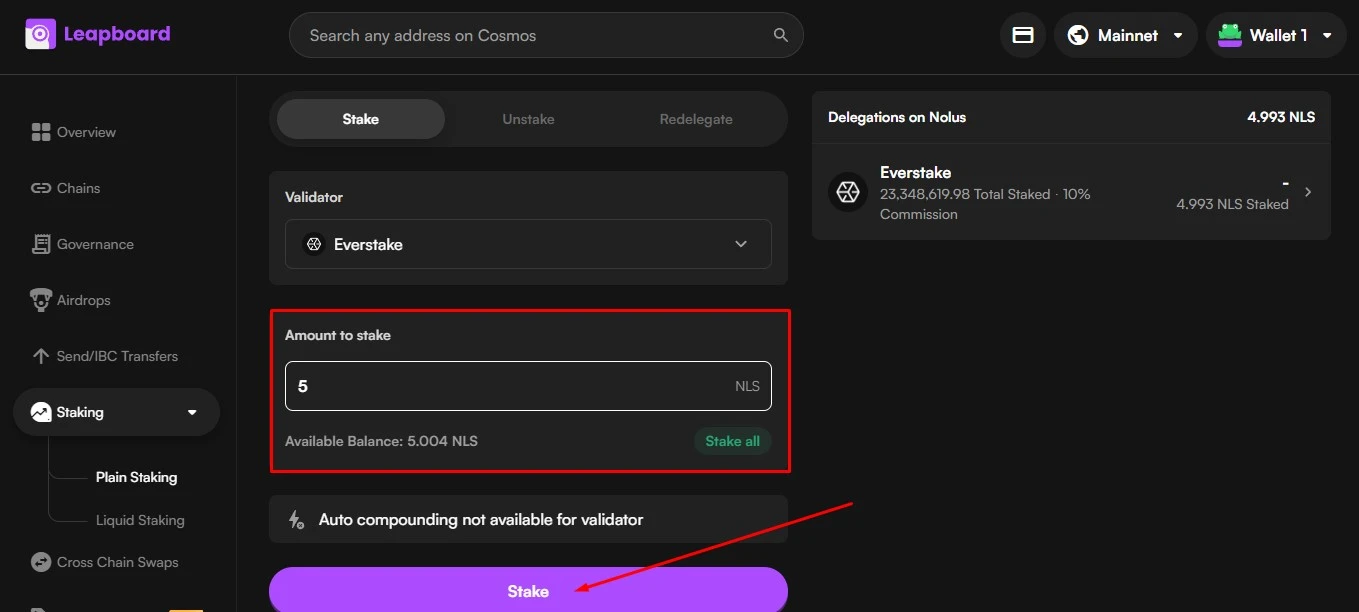
Once you’ve entered the amount, click on the Stake button. Congratulations, you’ve successfully staked your NLS with Everstake!

How to Stake NLS Using Leap Mobile App
Step 1: Install Leap Mobile App
Begin by visiting the official Leap website to obtain the download link for the mobile app. After downloading and installing the app, you’ll be presented with options: create a brand-new wallet or import an existing one. If you’ve previously used Leap, Keplr, or Cosmostation, you can seamlessly import those wallets into the Leap app.
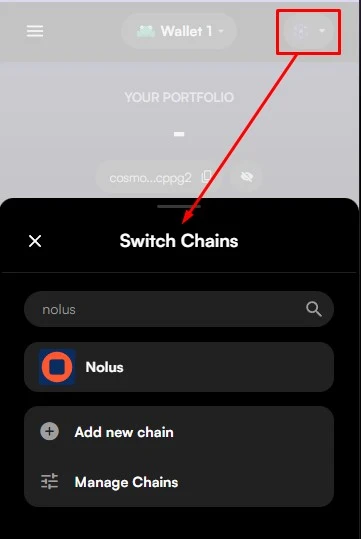
Step 2: Switching to the Nolus Chain
After opening the Leap Mobile App and accessing your wallet, locate the icon in the upper right corner. Tapping on this icon will reveal a list of available chains. Scroll through this list until you find Nolus. Simply click on Nolus to make the switch and set it as your active chain.
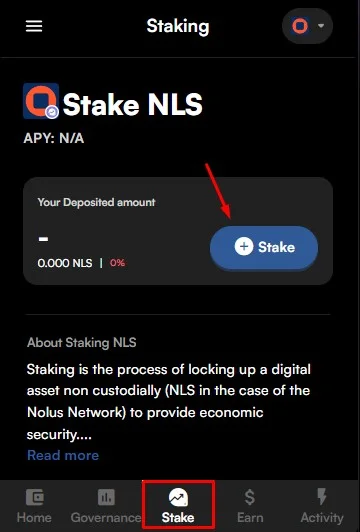
Step 3: Staking NLS Tokens
Navigate to the Stake section within the app. Once there, tap on the Stake button. You’ll be presented with a list of available validators. Select the validator you trust or prefer to delegate your NLS tokens to from this list.
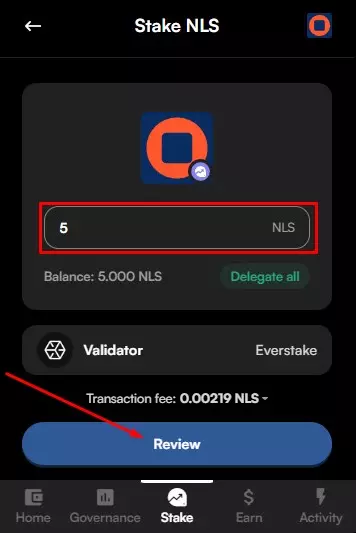
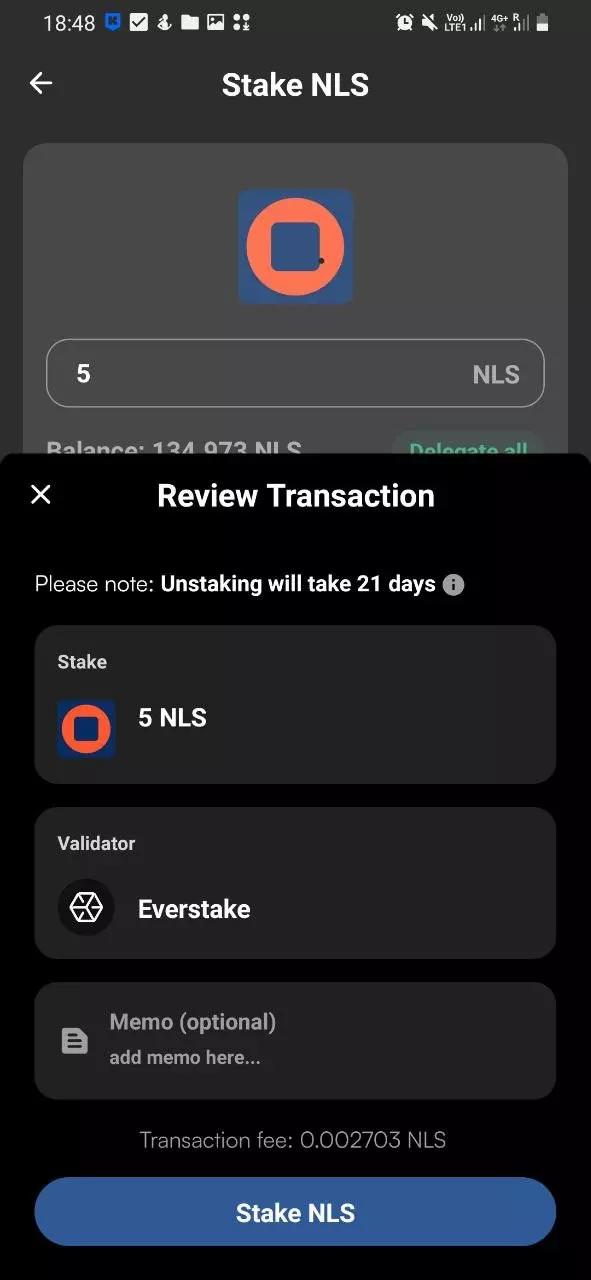
Step 4: Delegating Your NLS Tokens
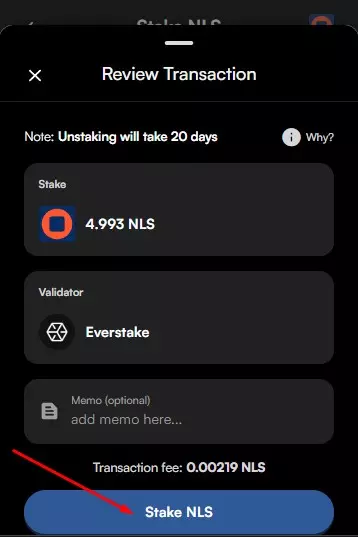
In this step, input the amount of NLS tokens you wish to delegate. It’s advisable to retain a minor portion of your tokens to cover any upcoming transaction fees. After entering the desired amount, tap on the Review button. Ensure all the details are accurate, and once you’re satisfied, press Stake NLS to finalize the delegation process.
Congratulations! Your NLS tokens are now delegated to your chosen validator. This is a significant step in participating in the network and potentially earning rewards. Ensure to monitor your staking activities and stay informed about any updates or changes.
Nolus Blockchain Explorers
Blockchain explorers are essential tools that allow users to view and verify transactions on a blockchain network. For the Nolus blockchain, specific explorers are designed to provide insights into the network metrics and details about Nolus validators.
The Native Nolus Explorer will provide you with the network metrics and Nolus validators’ details.
Conclusion
In the rapidly evolving landscape of Web3, Everstake stands tall as a trusted validator. Boasting a community of over 625k users across 70+ blockchain platforms, the credibility of Everstake is unquestionable. Established in 2018 by visionary engineers, we’ve matured into a self-reliant, thriving organization with a dedicated team of 125+ experts.
Our vast network includes over 8,000 nodes, covering a wide array of blockchain protocols, including bridges and oracles. But our influence doesn’t stop at staking. Through Everstake Capital, we actively invest in promising blockchain ventures in their early stages. Nolus is no exception to our commitment. We’ve made a significant investment in this project, underscoring our belief in its potential.
For those curious about NLS staking or seeking answers to related queries, our Nolus Blockchain Manager is always accessible on X, ready to guide and assist. Additionally, visit our dedicated Nolus staking page for in-depth staking information.