ethereum
How to Stake Ethereum (ETH) with Exodus Mobile Wallet: A Step-by-Step Guide
Turn your Ethereum into an active part of the network. Learn how to stake ETH in Exodus Mobile and receive on-chain rewards safely and easily.
OCT 09, 2025
Last updated OCT 10, 2025 · V1
Ethereum is one of the most widely used blockchains, powering thousands of decentralized applications and smart contracts. One of the most effective ways to contribute to its security and network participation is through staking. Staking ETH means locking up your tokens to support validator operations, while in return, you receive on-chain rewards.
This guide will walk you through staking Ethereum step-by-step using Exodus Mobile Wallet. You’ll learn how to set up your wallet, fund it with ETH, delegate your tokens, and later claim rewards or unstake when needed.
What is Ethereum and Why Stake It?
Ethereum (ETH) is the second-largest cryptocurrency by market capitalization and the foundation of decentralized finance (DeFi). Since Ethereum’s transition to Proof-of-Stake (PoS), the network relies on validators to propose and confirm blocks.
By staking ETH, you can:
- Help secure the Ethereum blockchain.
- Support decentralization.
- Participate in network consensus.
- Receive staking rewards directly on-chain.
Staking ETH is an accessible process that you can complete directly from your wallet like Exodus
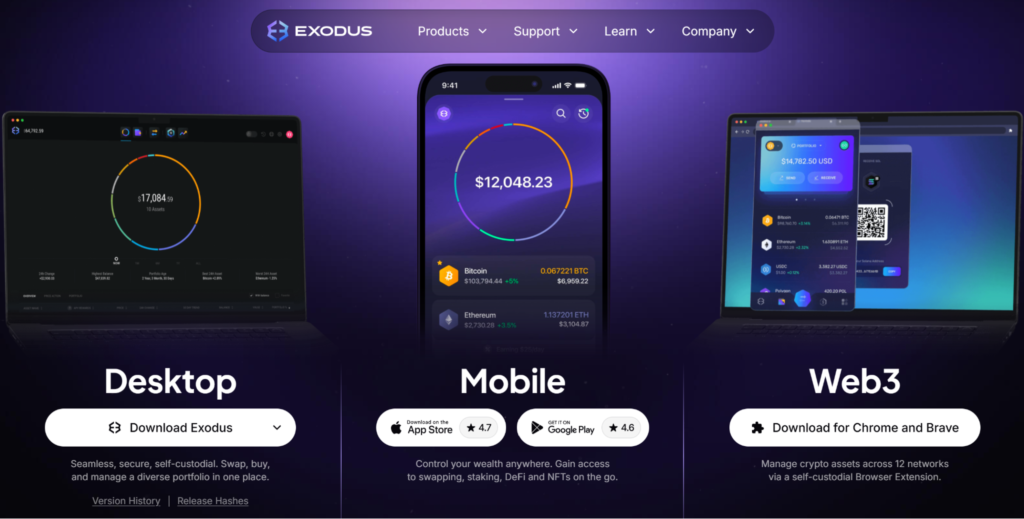
What is Exodus Wallet?
Exodus is a multi-currency, self-custodial crypto wallet that is available on both desktop and mobile. It supports hundreds of assets and offers a simple interface for managing, buying, and staking crypto. With built-in staking functionality, Exodus allows you to delegate ETH and track rewards without relying on third-party services.
Exodus is available on desktop and mobile, so you can choose whichever version suits your workflow. This guide will walk you through the staking process on the mobile platform. You only need to follow the steps.
How to Set Up Your Exodus Mobile Wallet
Follow these steps to set up and prepare your wallet for staking easily.
Step 1: Download the Mobile App
Go to the official Exodus download page and install the app for iOS or Android.
Step 2: Create a New Wallet
- Open the app and accept the terms and conditions.
- Tap Create Wallet.
- A short walkthrough introduces the main features, and your wallet will be generated automatically.
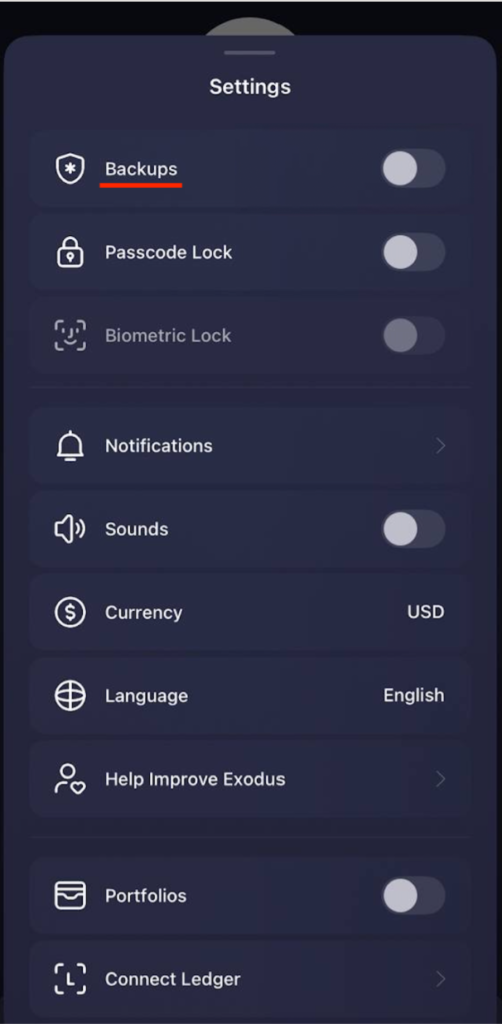
Step 3: Secure Your Mobile Wallet
Before staking, it’s critical to secure your wallet:
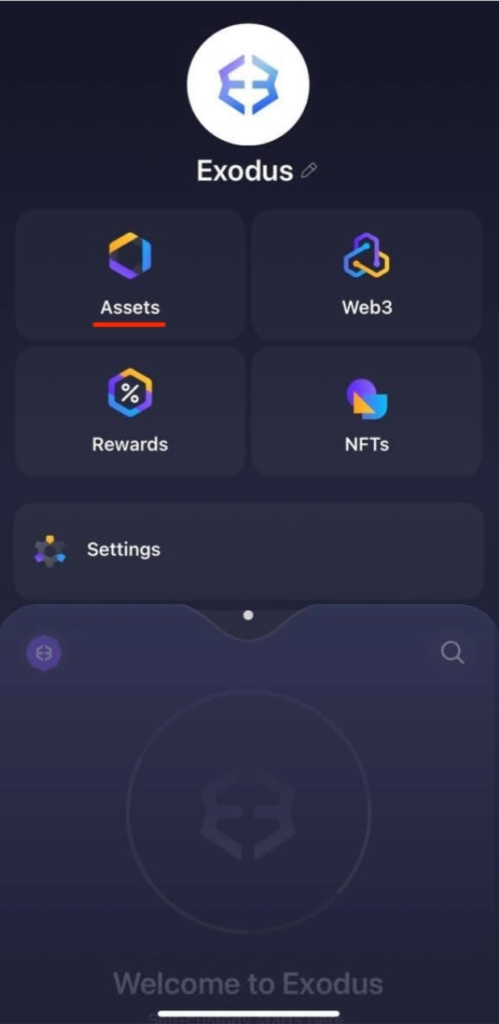
- Open the main dashboard and go to Settings.

- At the top, you’ll see: Backups, Passcode Lock, and Biometric Lock.
- Backups allow you to recover your wallet if your phone is lost or damaged.
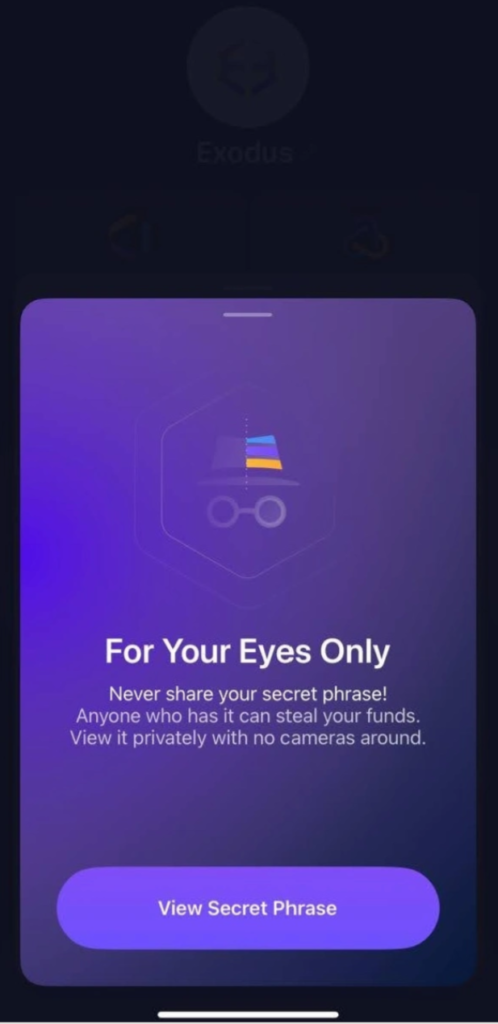
- Choose between iCloud Backup (Apple devices) or Secret Phrase (12 words you must write down).
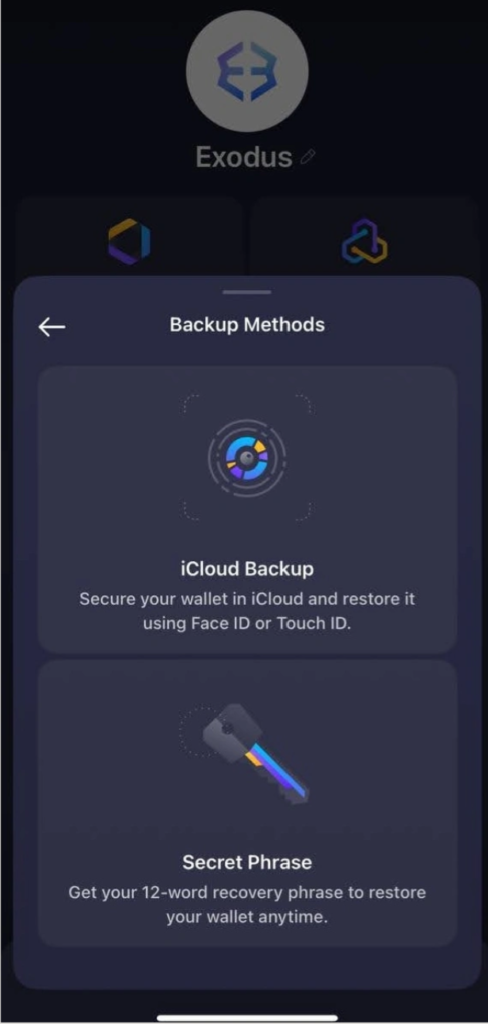
- Write the Secret Phrase offline and store it in a safe place. Avoid screenshots or saving it digitally.
Once your wallet is backed up and secured with a passcode or biometrics, you can start staking.
How to Stake ETH via Exodus Mobile
Step 1: Add ETH to Your Assets
- On the dashboard, tap Assets.
- Search for ETH and select it. Look for the “%” icon, it shows the token supports staking.
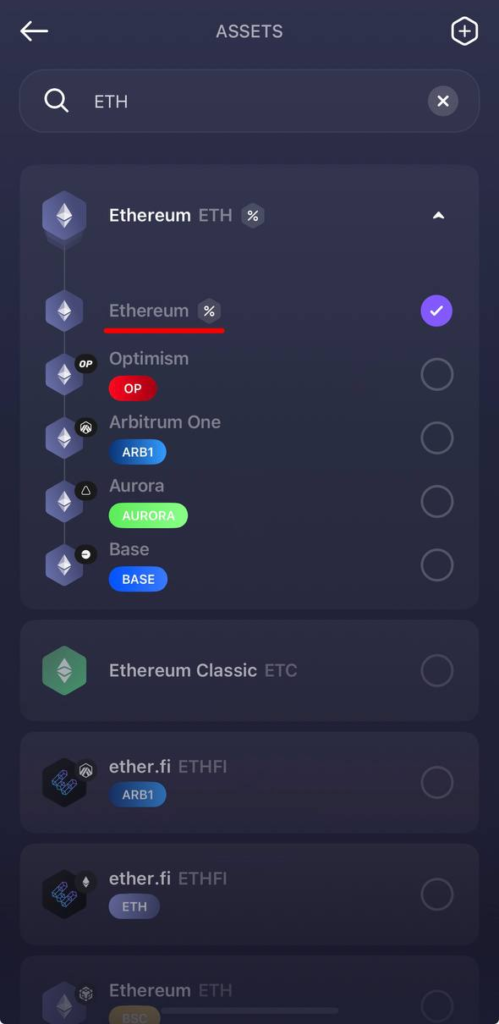
- Open the ETH tab.
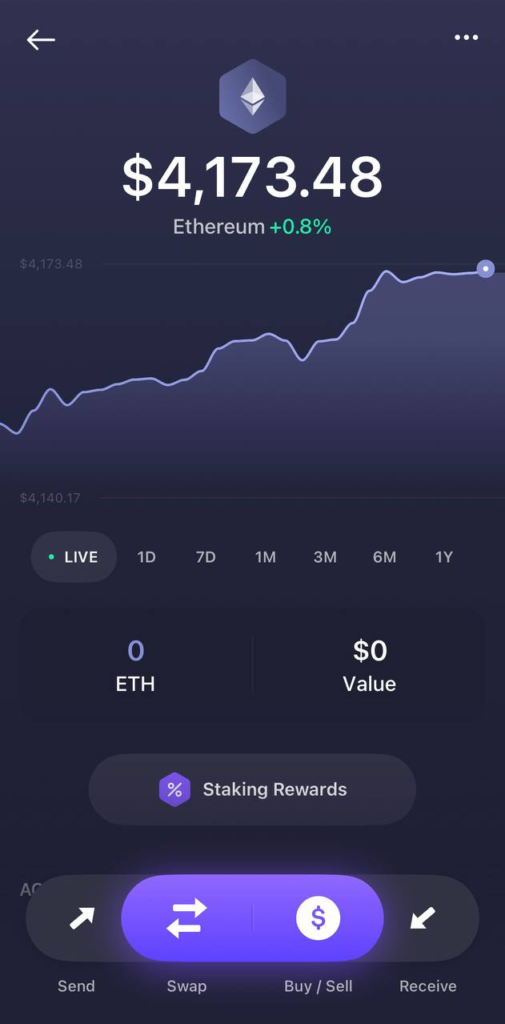
- Make sure you have at least 0.1 ETH plus a small amount for network fees.
Ways to fund your wallet with ETH:
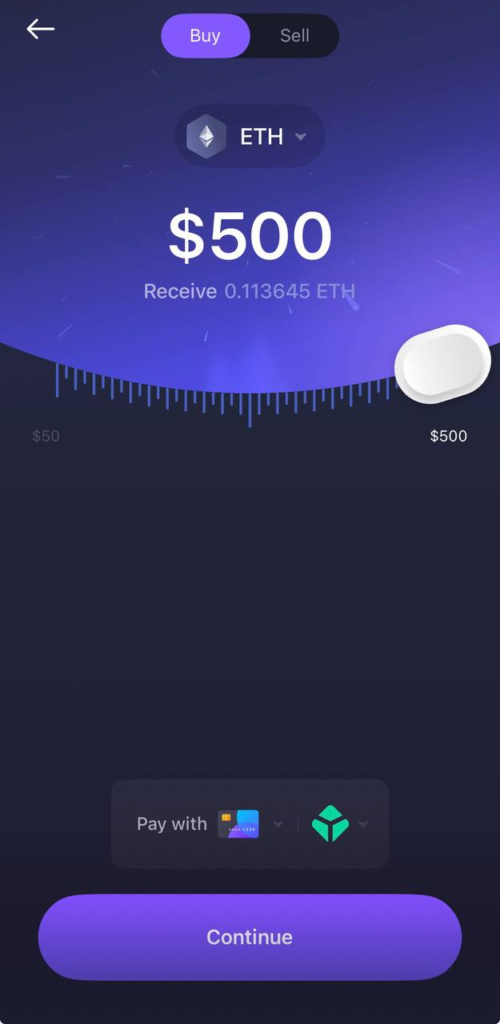
- Buy ETH via the Buy/Sell section. Use a debit card, through integrated providers such as Ramp, MoonPay, or Blockchain.com. Open the Buy/Sell section, select your preferred service, and follow the prompts to complete your purchase.
- Or Receive it from another wallet or exchange. Tap Receive Ethereum and copy your address.
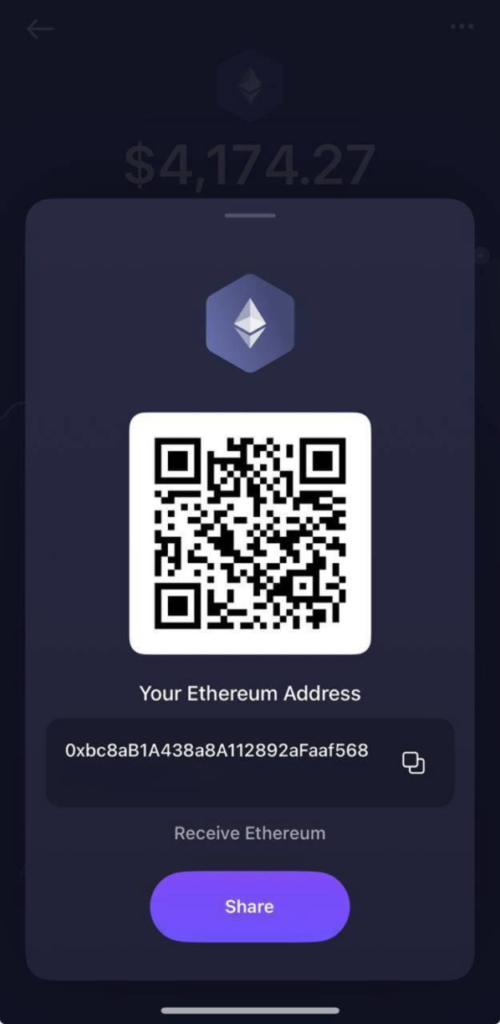
Use this address to send ETH from an external source.
Tip: Coingecko provides a full list of supported exchanges where ETH is available.
Step 2: Navigate to the Staking Tab
- In the ETH tab, tap Staking Rewards.
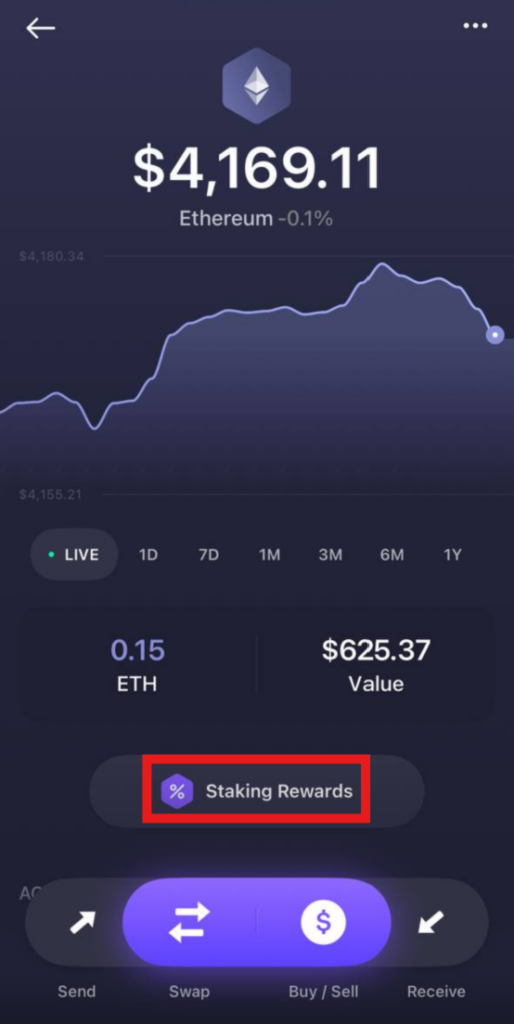
- Review current staking details.

- Tap Stake ETH and enter the amount you want to delegate.
- Tap Stake to confirm your action.
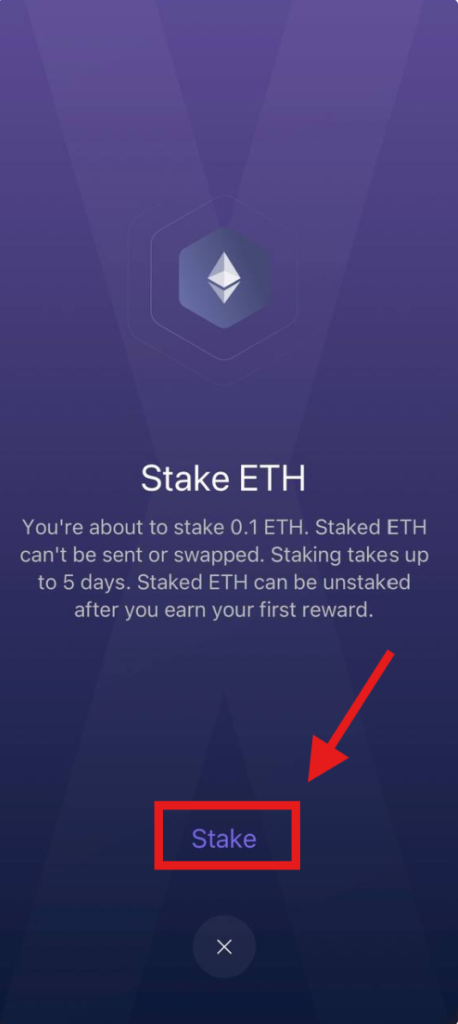
Once staked, ETH can’t be sent or swapped. Staking activation may take up to 5 days, depending on network congestion.
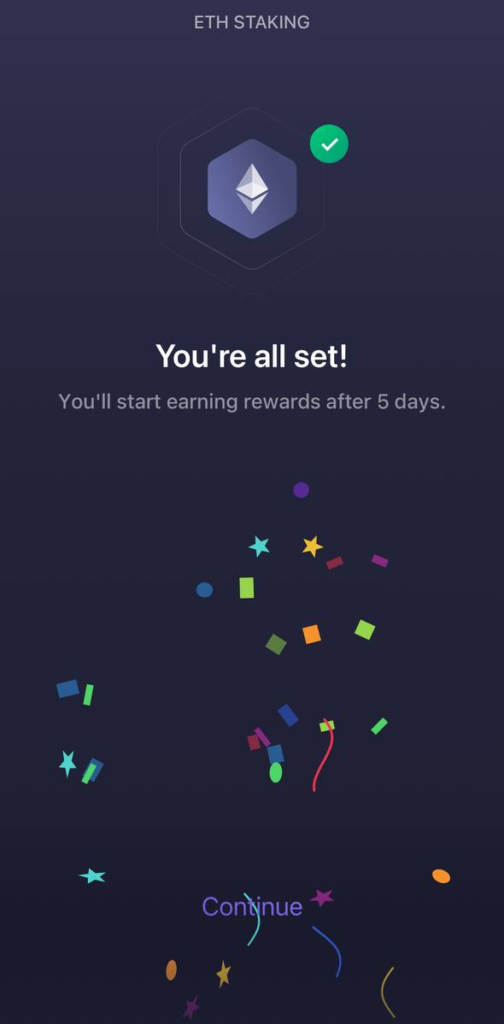
Congratulations! After confirmation, Exodus will show a notification that your ETH is staked.
How to Claim Rewards and Unstake on Exodus Mobile
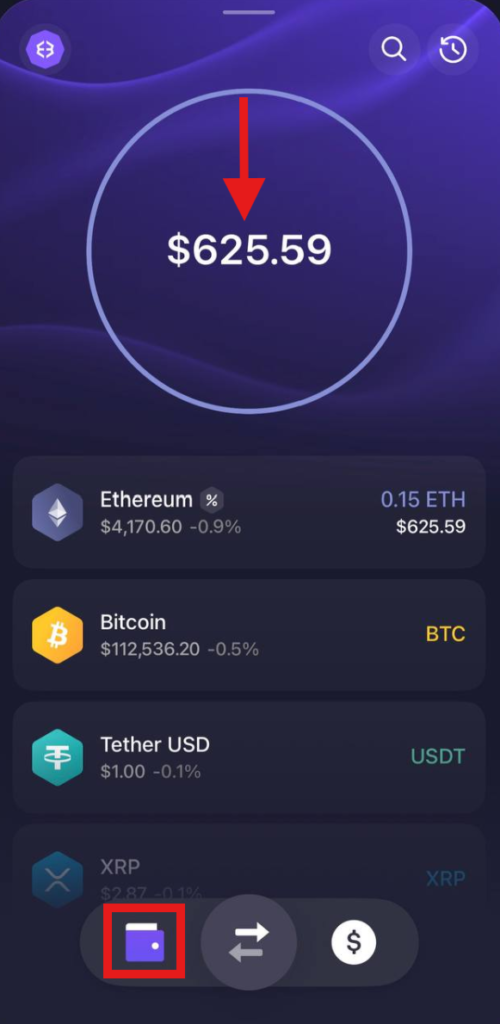
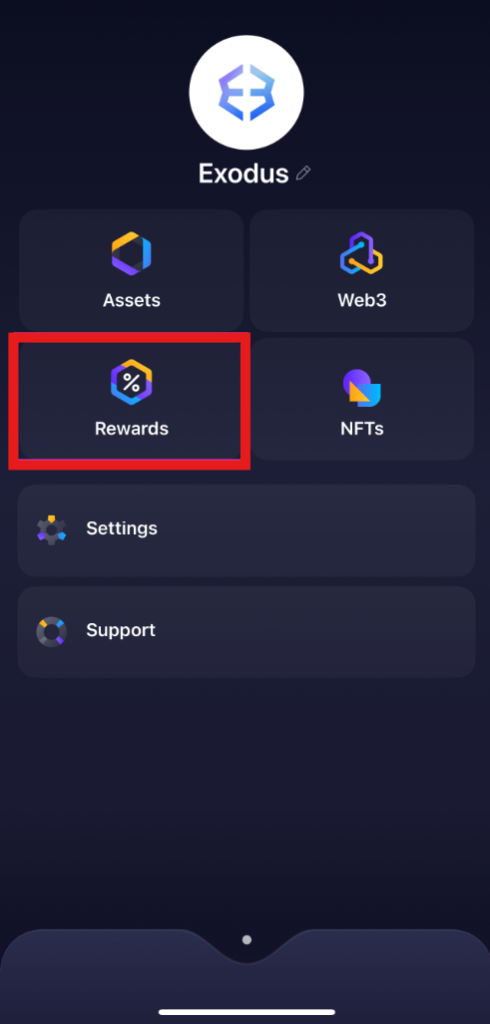
- Tap the wallet icon, then swipe down to the profile screen.
- Tap Rewards.
- Select Ethereum.
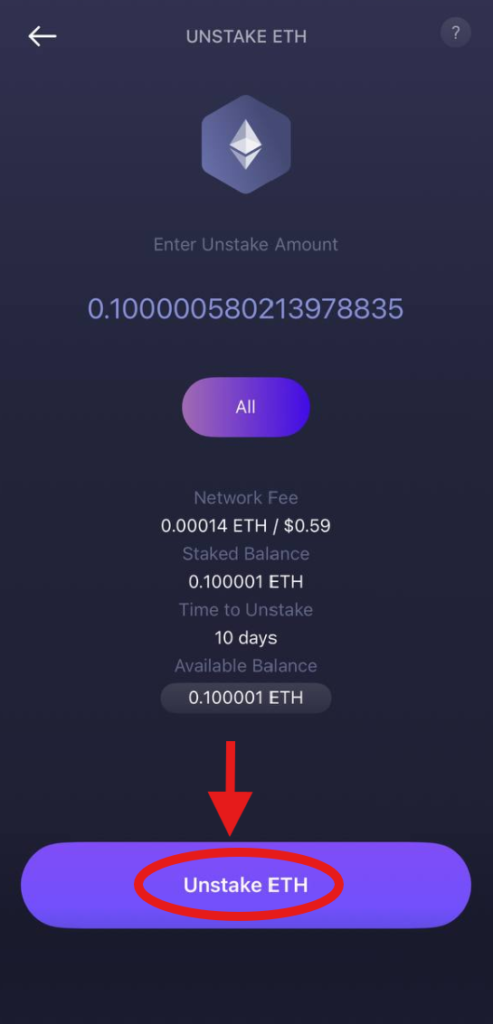
- Tap Unstake
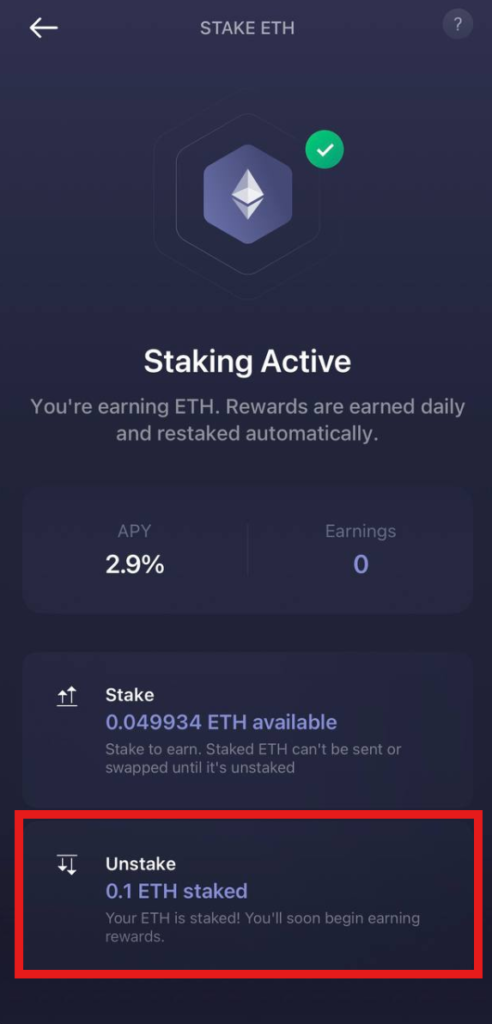
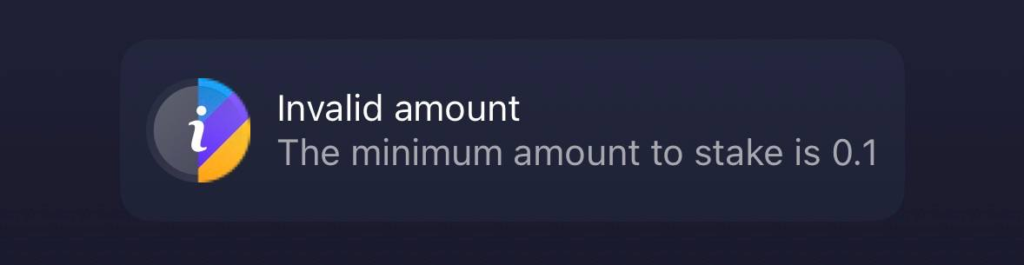
- Enter the amount of ETH to unstake (minimum 0.1 ETH, and at least 0.1 ETH must remain staked if you’re partially unstaking). Tap Unstake ETH.
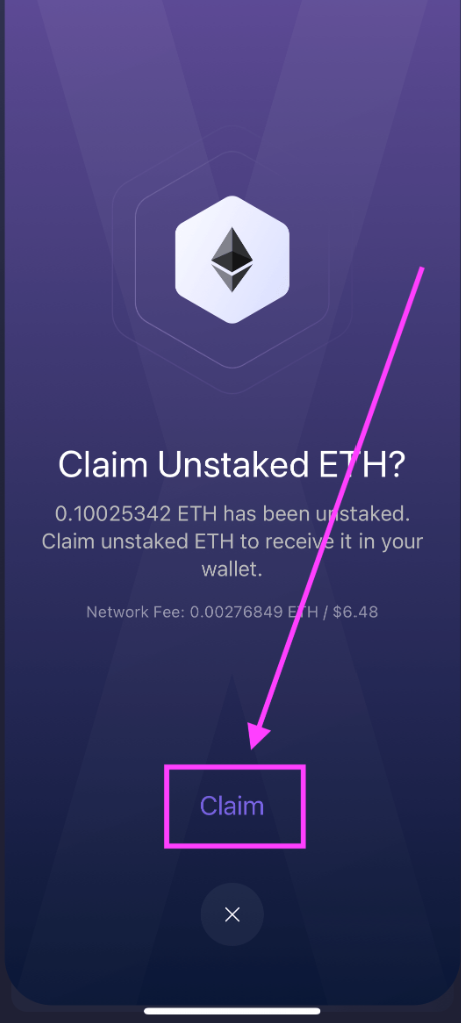
- When unstaking completes, claim your unstaked ETH to return it to your wallet balance. Tap Claim to get your rewards.
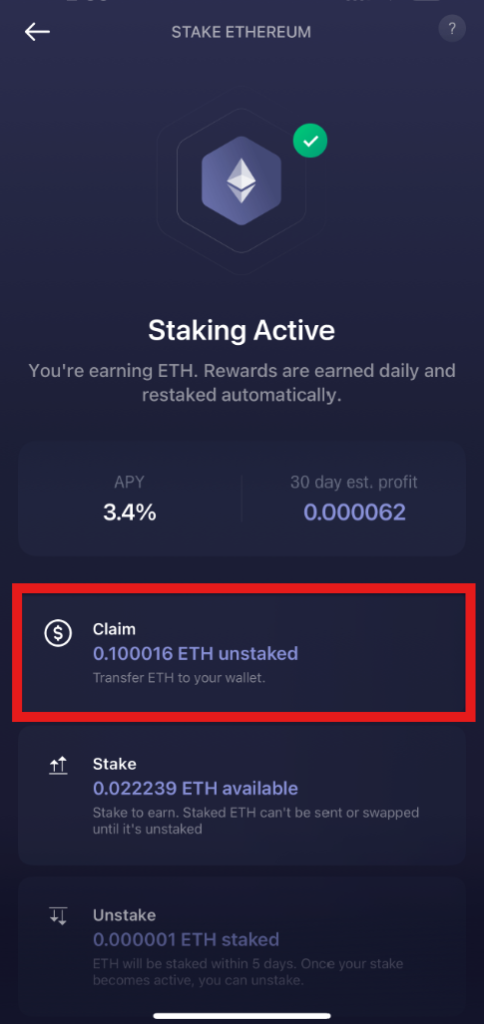
- Review the summary of your request and tap Claim to confirm.
That’s it! You’ve successfully managed your staking lifecycle in Exodus.
Last Words
That’s it, your ETH is now staked and working in the background. With Exodus, it really comes down to just a few taps. From here, you only need to check in once in a while to see your rewards or decide if you want to unstake some of your balance.
***
Share with your network