Aptos
Aptos Staking Guide: How to Stake APT Tokens with Everstake Dashboard
Aptos is one of the fastest and most secure Layer-1 blockchains built using the Move programming language. It’s designed to bring safety, scalability, and reliability to Web3 applications. Like other Proof-of-Stake networks, Aptos allows token holders to stake their APT and help secure the network while getting on-chain rewards. In this guide, you’ll learn how...
NOV 04, 2025
Last updated APR 28, 2026 · V1
Aptos is one of the fastest and most secure Layer-1 blockchains built using the Move programming language. It’s designed to bring safety, scalability, and reliability to Web3 applications. Like other Proof-of-Stake networks, Aptos allows token holders to stake their APT and help secure the network while getting on-chain rewards.
In this guide, you’ll learn how to stake your APT tokens using the Everstake Dashboard, a simple non-custodial interface that lets you delegate to Everstake in just a few clicks. We’ll walk through every step, from connecting your wallet to tracking rewards.
Why Stake APT?
Staking APT strengthens the Aptos blockchain by helping validators maintain network security and stability. When you stake your tokens with a trusted validator like Everstake, you contribute to decentralization and receive rewards directly on-chain.
Key benefits of staking APT:
- Non-custodial: you always keep ownership of your tokens.
- Consistent rewards: generated automatically from network operations.
- Support for decentralization: by delegating to a reliable validator.
Staking also encourages long-term commitment to the Aptos ecosystem. It aligns the interests of token holders and validators, ensuring that the network continues to grow sustainably. Everstake’s transparent infrastructure and enterprise-grade security make it easier for users to participate confidently, without relying on intermediaries platforms.
How to Stake APT with Everstake Staking Dashboard
Follow these seven steps to delegate tour Aptos.
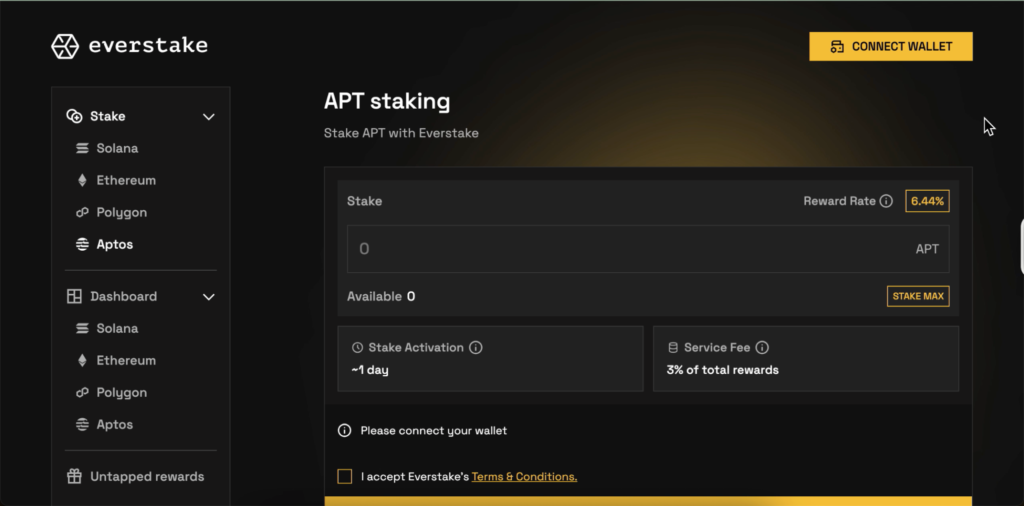
Step 1: Open the Everstake Dashboard
- Go to Everstake Staking Dashboard.
- Click Connect Wallet to begin.
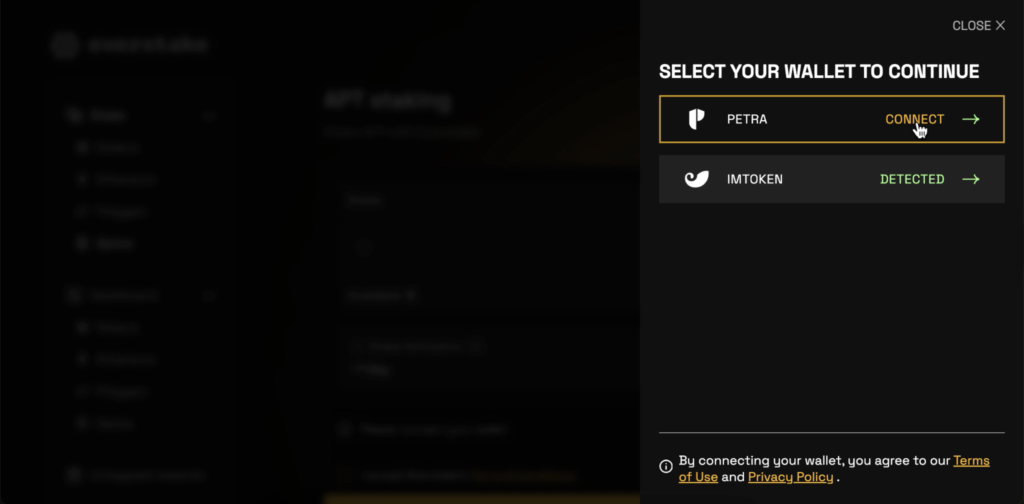
Step 2: Choose Your Wallet
- Select your wallet provider: Petra or imToken.
- Click Connect.
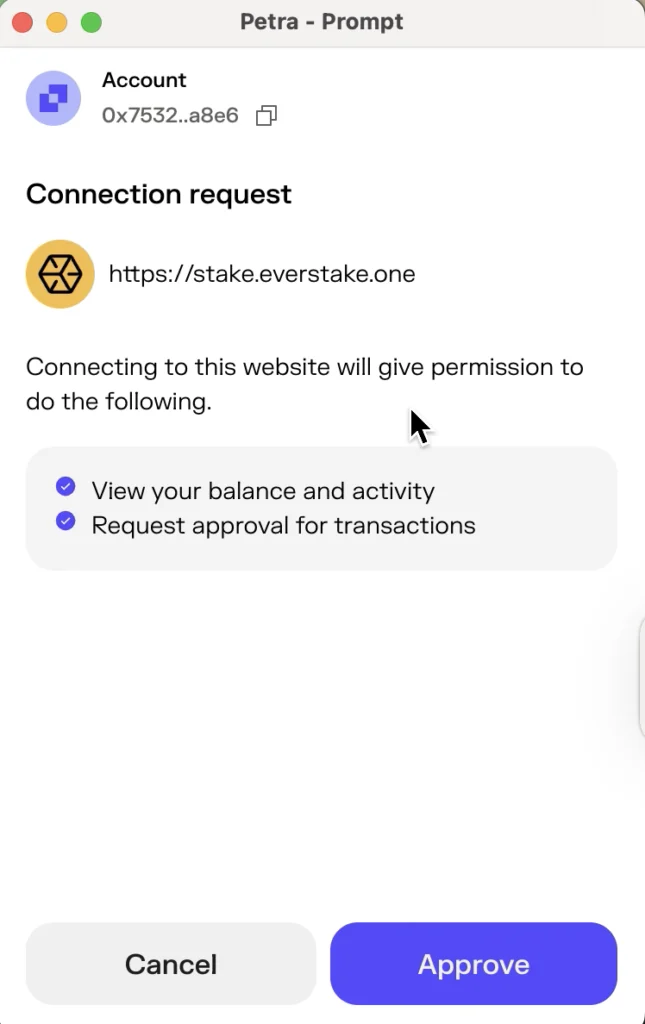
Step 3: Approve Connection in Your Wallet
- A popup from your wallet (e.g., Petra) will appear asking to connect.
- Click Approve.
Step 4: Enter the Amount to Stake
- Once connected, your available APT balance will appear.
- Enter the amount of APT you want to stake or press Stake Max.
- Then accept Everstake’s Terms & Conditions.

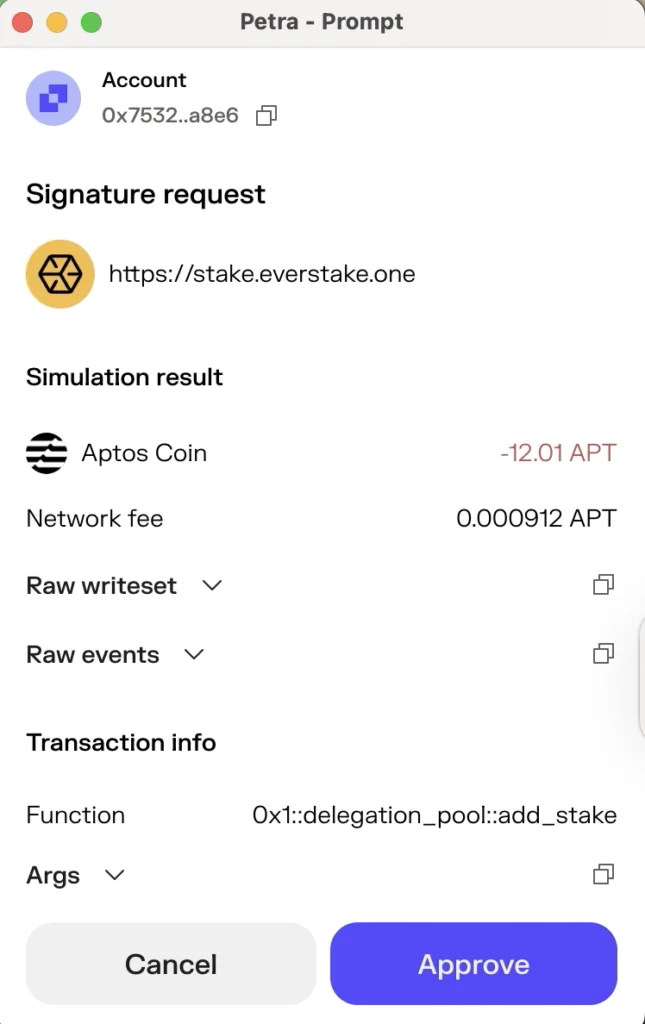
Step 5: Confirm the Transaction
- Click Stake Now.

- Your wallet will prompt a Signature Request showing:
- Function: 0x1::delegation_pool::add_stake
- Amount: your chosen APT (e.g., −12.01 APT)
- Network fee: ≈ 0.0009 APT
Review details and click Approve.
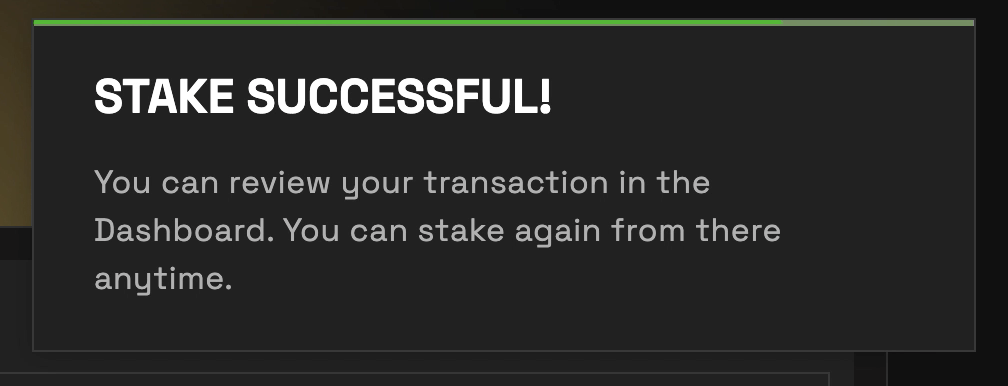
Step 6: Wait for Confirmation
After a few seconds, you’ll see Stake Successful!
You can review your transaction in the Dashboard.
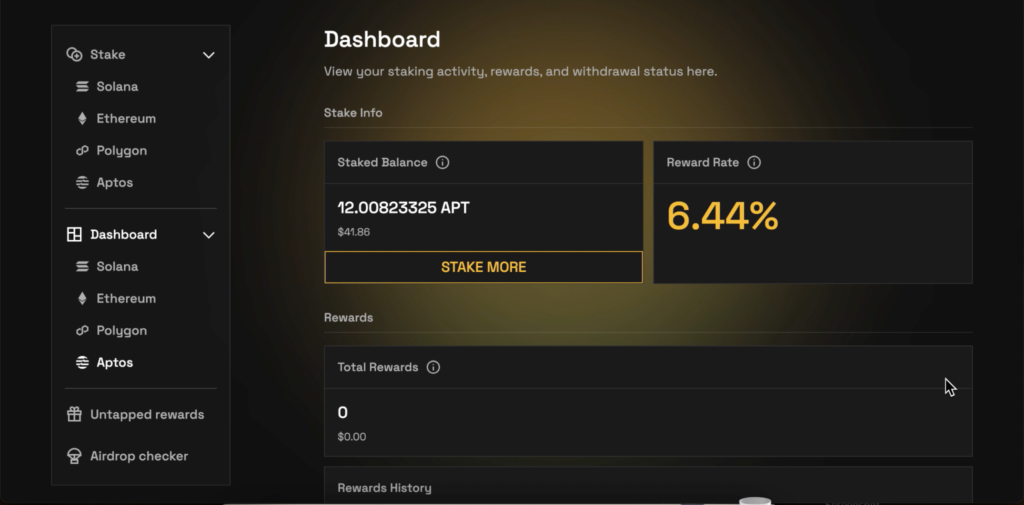
Step 7: Check Your Dashboard
- Go to Dashboard and click Aptos to view Staked Balance, Reward Rate and Total Rewards.
- Rewards will start accumulating automatically after the activation period (~1 day).
Last Words
Staking APT through the Everstake Dashboard is fast, secure, and completely non-custodial. By delegating to Everstake, you help secure the Aptos network while getting on-chain rewards directly to your wallet.
***
***
All metrics displayed on the website, including without limitations value of staked assets, total number of active users, rewards rates, and networks supported, are historical figures and may not represent the actual real-time data.
Share with your network